Friday, November 9, 2012

Card Challenge and Share

This month at Scrapjazz.com, Nora is hosting a card sketch challenge.  This is what I came up with:

I really enjoyed making this little card, it was simple, but very beautiful.  I really wanted to showcase the background stamp on this card, which is why I think the sketch was so awesome - it's perfect to showcase your large stamps.  If you would like to play along - here is the link for the thread for this month's challenge:
http://www.scrapjazz.com/forums/showtopic.php?tid/323154/

Thanks for stopping by and have a happy crafty inspired day!

Supplies: (Cardstock) Bazzill, Recollections, Stampin' Up! Garden Green; (Ink) Stampin' Up! Chocolate Chip, Stampin' Up! Marina Mist; (Stamps) Stampin' Up! Petite Pairs, Stampin' Up!  Sweet Floral; (Dies) Spellbinders Lacey Circles, Spellbinders Circle

Wednesday, November 7, 2012

Envelope Mini Album

I have to admit to everyone, I really like getting junk mail - weird right?  Well let me say that I used to not, but I stumbled across a tutorial on YouTube by Laura Denison showing how to use up those junk mail envelopes - and I look forward to opening my junk mail just to get the envelopes!  While cleaning my crafting area the other day, I realized that I had a rather large build up of these envelopes, so I decided to make a real quick mini.  The tutorial that inspired this can be found on YouTube:  http://www.youtube.com/watch?v=RjzRGSevuuQ

Here is what I came up with:


I have not added photos or anything yet, mainly because I was not sure what I wanted to use this for - I just wanted to create.  The nice thing was that I was also able to use up a lot of my scraps from other projects in this mini album - I didn't cut new paper, just used what was left over from other projects.  For the large tags, I added ribbon by stapling it to the tags - I was also able to use up some old ribbon!

Supplies:  (Cardstock) Bazzill, Stampin' Up!; (Pattern Paper) My Mind's Eye, Provo Craft, Die Cuts With a View; (Stamps) Stampin' Up! Established Elegance, Stampin' Up! Faith in Nature, Stampin' Up! Friends 24-7; (Ink) Stampin' Up! Chocolate chip, Tim Holtz Gathered Twig; (Dies) Stampin' Up! Framelits, Spellbinders Lacey Circles, Spellbinders Circle, Spellbinders Scalloped Rectangles

Monday, November 5, 2012

Life Is Beautiful Canvas

I am so excited to share a project that I have been working on for years mentally and months physically.   I got the idea several years ago while in a craft store in which the canvas had other canvases layered on top of it.  It was a beautiful texturie canvas - and the idea stuck and stuck.  Well fast forward years later and this is what that inspiration turned into:

 I built this canvas using the wood blocks from stamps that I had unmounted.  I never parted with them because it felt like such a waste.  This canvas is a 16x20 base, and the large wood blocks are little more than 4x6 (designed for background stamps).  Here are some close ups of the canvas:


Isn't it gorgeous?  I cannot even begin to express how happy I am with this project.  I have been working on it on and off for months, putting it aside when I lost inspiration.  Here is a video of this same project:


Thanks for stopping by, I hope you enjoyed your visit and have a happy craft inspired day!

(Supplies):  Tattered Angels Glimmer Glam, Tattered Angels, Glimmer Glaze, Tim Holtz Acrylic Paint, Jacquard Lumiere Paint (Inks and Pain); Stampin'  Up! Classic Ink Chocolate Chip, Stampin' Up! Classic Ink (Ink); Stampin' Up! punch, Stampin' Up! Four Frames Stamp set, Stampin' Up! Broadsheet Stamps


Sunday, November 4, 2012

What's For Dinner

I bet you are wondering why I am posting about Dinner in the morning on a crafty blog!  Well, I will share.....

 It's a menu board.  As both my husband and I are at school full time and our lives are even more hectic now that he is out of the Army - if you can imagine that.  I thought it was time to increase our communication about food plans by creating a menu board.  This was a super easy project to make and I will share how I made it in just a moment.  But before I do that, I wanted to share with you the super cute clothes pin!
Okay, so how did I make this little guy you are wondering?!
  1. The board is actually the bottom of an Ikea shelf that I purchased, put together and realized it was the wrong size for the furniture it was supposed to go in. I was unable to return it, so $40 down the drain - I saved it, and used it here.
  2. Sprayed the heck fire out of the piece of particle board using Chalkboard Spray paint
  3. While the spray paint was drying, I cut out the title "Menu" and each letter for each day of the week on my Cricut using Vinyl.
    • Menu was cut using Gypsy Wanderings Font
    • The little swirls were Cindy Loo which I welded to the Gypsy Font using my Gypsy
    • The letters for each day of the week were cut using Cindy Loo
  1. The clothes pin is from Michaels - I covered it in paper, inked the edges and then covered it in Glossy Accents.
  2. I ran the back of the board with Magnet strips using E6000 - nothing else worked, including the glue gun.
If you count the time it took for the board to be ready (24 hours of spray paint dry time and glossy accents hardening time) this was a 2 day project.  If you count just the time I spent working on it, this was a 1 hour project.  And it's SUPER CUTE!  And lets face it, whenever your husband calls it cool project and admires your creativity, you know it's an awesome project.   Not to mention, this was my very first time using Vinyl in my cricut, I'm pretty sure I am in love!

Thanks for stopping by, having a creatively inspired day!


Friday, November 2, 2012

9{11} 2009

Recently I participated in a challenge at one of my scrapbook forums Scrapjazz.com - this month's Use It Up Challenge included the following:


  • Chipboard
  • 3 Buttons
  • a punched image
  • Mist spray or paint
  • Transparency 

I took this opportunity to begin working on an album that will contain all the letters, photos, and ephemera that was collected by myself and my husband while he was deployed - this is the first page of that album.  And this is what my finished product looks like:
 I cannot tell you how much fun I had making this layout.  This has been a project that I have been dreading to start for a while just because of a lack of direction in how to do it!  But this challenge and the new technique that I tried had really inspired me to get a leg up on this long awaiting project.

The background of this layout was done using clear glue, reinkers, and a transparency.  This is generally a technique that is done in cardmaking and is known as the Acetate and Tissue Paper technique.  You can find a tutorial for it here.  It was such a fun technique and definitely made using my transparencies more appealing and fun. The technique generally only uses one color of reinker, but I used two to create more of a mixed and distressed look.  Before I did the technique, I stamped the underlying cardstock using a glass to make watermarks. I did the same thing for my journaling card. 

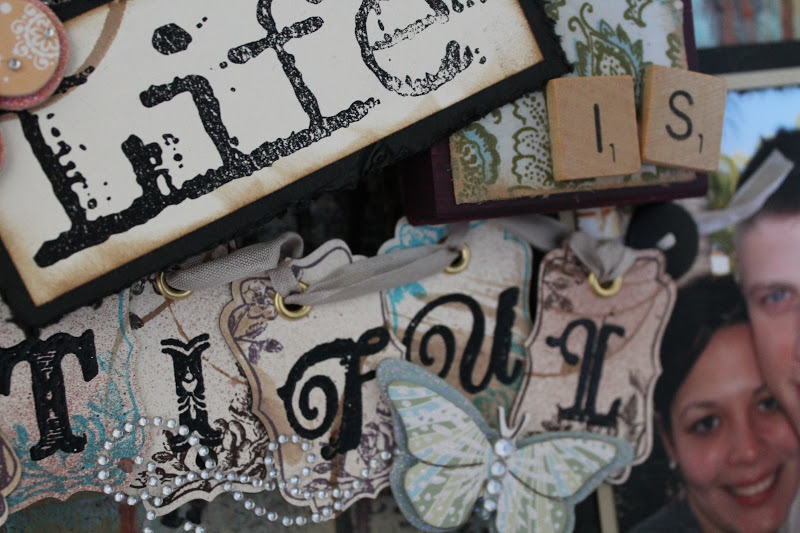
Here are some closeups of some of the details:


Thanks for stopping in today and have a happy crafty creativity inspired day!

Supplies: (Inks) Walnut Stain Distress Reinker, Antique Linen Distress Reinker, Gathered Twigs Distress Ink, Ranger Acrylic Paint Black; (Paper) Stampin' Up! Vanilla Cardstock, Tim Holtz Paper Pack, K&Company, Bazzill, Teressa Collins World Traveler Transparency; (Stamps) Unity Stamp Co Postcard; (Embellishments) Tattered Angels, Buttons from Stash, Mon Ami Gabby Burlap, Mon Ami Gabby trim; (Letters) American Crafts, Pink Paislee