Sunday, February 5, 2012

Paper Trey Ink and Birthdays

A friend of mine recently had her birthday, and of course, I made a card for her.  Which, of course, I have yet to give to her..... But, either way, I thought that I would give you a little share.  I had a chance to play with some of my favorite things from Paper Trey Ink - the Mehndi Medallion Stamp set and the Mehndi Medallion texture plate:

I also got the chance to play with one of the stamps sets I got for Christmas, the Inside and Out: Birthdays set, which by the way, I highly recommend as it comes with awesome greetings AND inside sentiments.

Supplies: Baby Blue and Mint Green Cardstock (Making Memories); Kraft Cardstock (Recollections); Happy Birthday (Paper Trey Ink Inside and Out Birthday); Medallion (Paper Trey Ink Mehndi Medallion Stamp Set); Medallion Texture (Mehndi Medallion Texture Plate Paper Trey Ink); Stampin' Up! Ink

Stampy Goodness and How I Store Them

Let me start off by saying, I love all stamps.  But I prefer some storage methods over others.  Specifically, I like ALL UNMOUNTED stamps.  Seriously, I have an allergic reaction to wood mounted stamps.  Part of it is because I can't see through the blocks, that drives me nuts.  But also, wood mounted stamps take up mass amounts of space.  Huge. Amounts. Of. Space.  And I do not taking up more space than is absolutely necessary.  I've shared with you before how I store my stamps, but it wasn't a very effective post... So, let me share with you again, in more depth.  And show you how I unmount my wood block stamps.

How My Stamps Are Stored:

I store my stamps in these guys .  They have several different styles and sizes.  I found that the larger ones fit my needs better and the inserts that go inside are 8.5x11.  They are totally enclosed binder boxes so that if your stamps ever fall off the cling (which they don't) you don't loss them.  They will stay safe and secure inside your binders.  And as you can see, I store my stamps by Manufacturer.  In order to keep track, I have a Stamp Index (2 now) in which I have indexed my stamps by theme and stamp the image in each corresponding theme.  You may be wondering how many each binder can hold..... that depends on the thickness of your mounting foam/Acrylic Stamps.

I have 6 sheets with stamps on each side with paper divers between each sheet in this binder.  And it closes perfectly, snug but perfect.


My foam mounted ones can fit 4 double sided pages per a binder.  This binder particularly holds my stamps from Unity.  Unity Stamp Company has full 8.5x11 sheets of stamps that they sell, and I can fit one whole sheet on each page.


The stamps themselves are stored on EZMount Lightweight Storage Panels.  It was cheaper and easier or me to purchase them rather than buy chipboard and laminate it.  I have also seen options in which you place the chipboard in sheet protectors.  There are a lot of options for creating these Storage Panels, and for purchasing, this was just the option that I went with and am very happy with.   

I like to be organized, and see what's in each box, so on the cover, I save all the stamp inserts and such and put them on the cover of the binder that they are in.  Just like this:

 Now, just for the record, not all of these stamps come as clear mount (meaning use with an acrylic block).  Sometimes I do have to unmount my stamps from the block and change them over to static cling.  To do that, you need the following supplies
  • Microwave
  • Sharp coated scissors with a good point on them such as Tim Holtz or Cutter Bee.
  • Static Cling Cushion (EZMount by Sunday International, or Hambo)
    • Just a note.  Hambo is much much cheaper than the Sunday International brand.  I have never used it, just made my first order, I'll let you know how it goes)
  •  Goo Gone - to clean your scissors after you're done.
 
1.  Heat your stamps in the microwave, I put mine in a glass dish first, just so that it makes it easier to handle them.  You will want to cook your stamps for about 1min30 seconds.  This is to heat the glues that hold your stamp, cushion, and block together.


2.  Next, you will want to peal the stamp fromt he block, and then peal the cushion from the stamp


 3.  You will place the unmounted stamp onto the sticky side of the cling cushion.  With the Image side up.  I generally do a whole bunch of stamps at the same time, or a sheet at a time.


 4.  Once that is done.  You will cut around the stamp.  Make sure to not cut into the image.  And you need to cut straight.  Meaning, do not cut the excess foam off at an angle.  If you do, the foam will not completely cover your stamp.  This leads to uneven pressure when you use your stamp which means wonky images.  This is the stamp in which your scissors will get gooey and ewwy.  That's okay, it'll clean up.  Some people dust the stamps and sticky stuff with baby powder to reduce the stick.  I didn't notice a different.
5.  Last, you flip the stamp over, and peel the backing off - this is the side that has the static cling to it.  And it is ready to store!


Friday, February 3, 2012

Swaps, Swaps, and More Swaps

I love swapping, it really is a lot of fun, and a cool way to see new and different ways of doing the same thing.  Just love it.  As you all know, I've been spending a lot of time swapping over at Mini Album Scraps.  The last round, I participated in the Stick Pin, Flower, and "CREATE" word banner swap. And so, today, I thought I would share with you all what I have created! Grab some coffee, tea, hot chocolate, whatever your poison of choice and continue on..... It's a long post with lots of pictures today!

1.  Stink Pin Swap
I love stick pins, really.  And this particular go around, I was excited that it had the theme of Love/Valentines Day. I haven't always been so excited about Love/Valentines Day month, but to be honest, it is a holiday that tastefully surrenders eloquently to crafting girly style.  With that in mind, I went with the colors of love, well mainly Red, Brown and Cream, with some black thrown in.  Here is the finished product:
 A little bit of a confession:  I've been collecting Valentine's Day themed stamps and such for age with all these glorious plans for them that are never really executed. Either way, this is the first time that I have ever used the stamps for the tag!  Even better is the fact that the base that the stick pins are adhered to is corregated cardboard I pulled from the trash. Yes.  The Trash.  I just took of the surface from one side and added some Glimmer Glam and acrylic paint.  It gave it a shabby chic grungy look.  I love it.

And the close up of the stick pins:

 Check out those pins!  I love them!  For this particular round, I got some really pretty specialty beads.  My favorite were the heart charms.  I just loved them!

Supplies: Tag (Cardboard from trash); Cardstock (Bazzill Raven, Bazzill Pomegrante, Recollections Kraft); Stamps (My Sentiments Exactly, Studio G); Inks (Stmapin' Up! Cherry Cobbler, Chocolate Chip and basic Black; Tattered Angels Glimmer Glam; Pearlesent Pearl Paint); Stick Pins (Corsage Pins from Michaels)

2.  Flower Swap
Ever since I got the Tim Holtz Tattered Floral die, I have been on a "create my own flowers" kick.  And let me tell you, it is soooo much fun!  I know that I've said it before, and I'll say it again, if you do not get any other die you NEED this one.  I made all of these flowers from the same die:

 And some close ups of each flower:
These are a paper flowers.  I made these modifying a tutorial a bit to fit my needs.  The flower tutorial can be found here.  Before assembling my flowers, I inked all their edges, after they were assembled I took a toothbrush dipped in acrylic paint and added some color.  I think they turned out fabulous.
 These are a paper and aluminum foil.  This is just the standard rose that there are a bazzillon tutorials on, each is the same.  Just google it and find one that you get.
 And these (by far my favorite) are made with coffee filters.  You can find the tutorial here.
And the tag:

I kept the tag pretty simple so that it can be reused in another project.  The front has been covered in pattern paper, and the back is just plan for journaling and a cute little key stamp.  I sprayed it with some neutral colored Glimmer Mist and inked the edges.  The tag itself was cut from the Tags, Bags, Boxes and More Cricut Cartridge.

Supplies: Ink (Stampin' Up! Chocolate Chip, Stampin' Up! Early Espresso, Stampin' Up! Basic Black); Paint(Americana True Red); Tattered Angels Glimmer Mist Walnut Gold, Red Nose Reindeer; Paper (Michaels Recollections Kraft); Patterned Paper (Recollections Stitch in Time); Cricut Tags Bags Boxes and More Cartridge; Stamps (Studio G)


3.  "CREATE" Banner
I seriously have a deep love for banners.  I never know what I am going to do with them, but I figure I might as well have a stash of them!  However, I am in the process of creating decorated spaces in my home where all the banners I am accumulating will go.  With that in mind, this month's banner swap was specifically for our craft space, and had the color scheme of Pink, Black, and White/Cream. Here is what I came up with:
Aren't they fabulous?!  I had such a fun time making these.  I got some awesome stuff for Christmas, and this was the first thing that I made following Christmas.  So I even got to play with some of my new supplies. And because we are always about the details, some close up pictures:


The hardest part about making these guys was trying to figure out how to use the Martha Stewart combination punches the edger and the corner rounder.   After some trial and error I totally got it, and if you want something else to add to your stash, her punches.  I am in love with them.  They are fabulous to have on hand!  The beauty of this project is that I used 4 sheets of 12x12 plus scraps from my scrapbox to make these all.  So not very supply heavy at all!  One of the benefits to making banners - you can use up all your random bits and pieces.

Supplies:   Bazzill Glazed, Bazzill White, DCWV Glitter Pack, GCD Patterned Paper, Recollections Pink Card Stock (Paper and Cardstock); Stampin' Up! Classic Ink (Ink); Gypsy Wanderings (Font); Cricut, Martha Stewart, Stampin' Up! (Punches and Tools); Prima (flower); Michaels Dollar Spot (Bling); Stick Pins were handmade.
Hopefully you have enjoyed my shares, and feel inspired to do some creative crafting yourself!

Wednesday, February 1, 2012

In Need of Some Color Inspiration?

Well, I have the thing for you today!  I love color palettes, they make my life and selecting papers or colors for any project much easier.  And not to mention that color combinations themselves are just inspiring.  With that said, I thought I would share with you all where I get my color inspiration from (in no particular order).
  1. Color Combos Galore:  The website has fabulous color combinations and prompts.  Also, she keeps a running archive of all past color combinations meaning you have loads of limitless color ideas
  2. Color Stories Inspiration:  This is a similar site to the first that just launched.  However, what I love about this place are the prompts!  Oh the lovely prompts! And the fabulous inspirational photos.  Another fabulous site that I am sure will be around for a long time!
  3. The Color Scheme Bible by Starmer:  I LOVE THIS BOOK.  I ran across it a few years ago a a big box bookstore.  Every time I went in I would run my hands and fingers across the pages with all the beautiful color combinations.  I know it is meant for paint swatches for home decor, but it is great at providing multi color combinations for scrapbooking, paper crafting and artsy projects in general.  You can see a little sneaky peak of it down below.  I just love it, and the best part is it gives you complimentary hues of the main color for each combination.  It also gives a description of the mood that it sets.  Another awesome feature, it's organized by color group.  This little book is a serious must have for me, it goes with me when I travel.

 Hopefully you have found some new places of inspiration for all your color needs!

Monday, January 30, 2012

Home Decor: Tile Coasters

Hello all my lovelies,

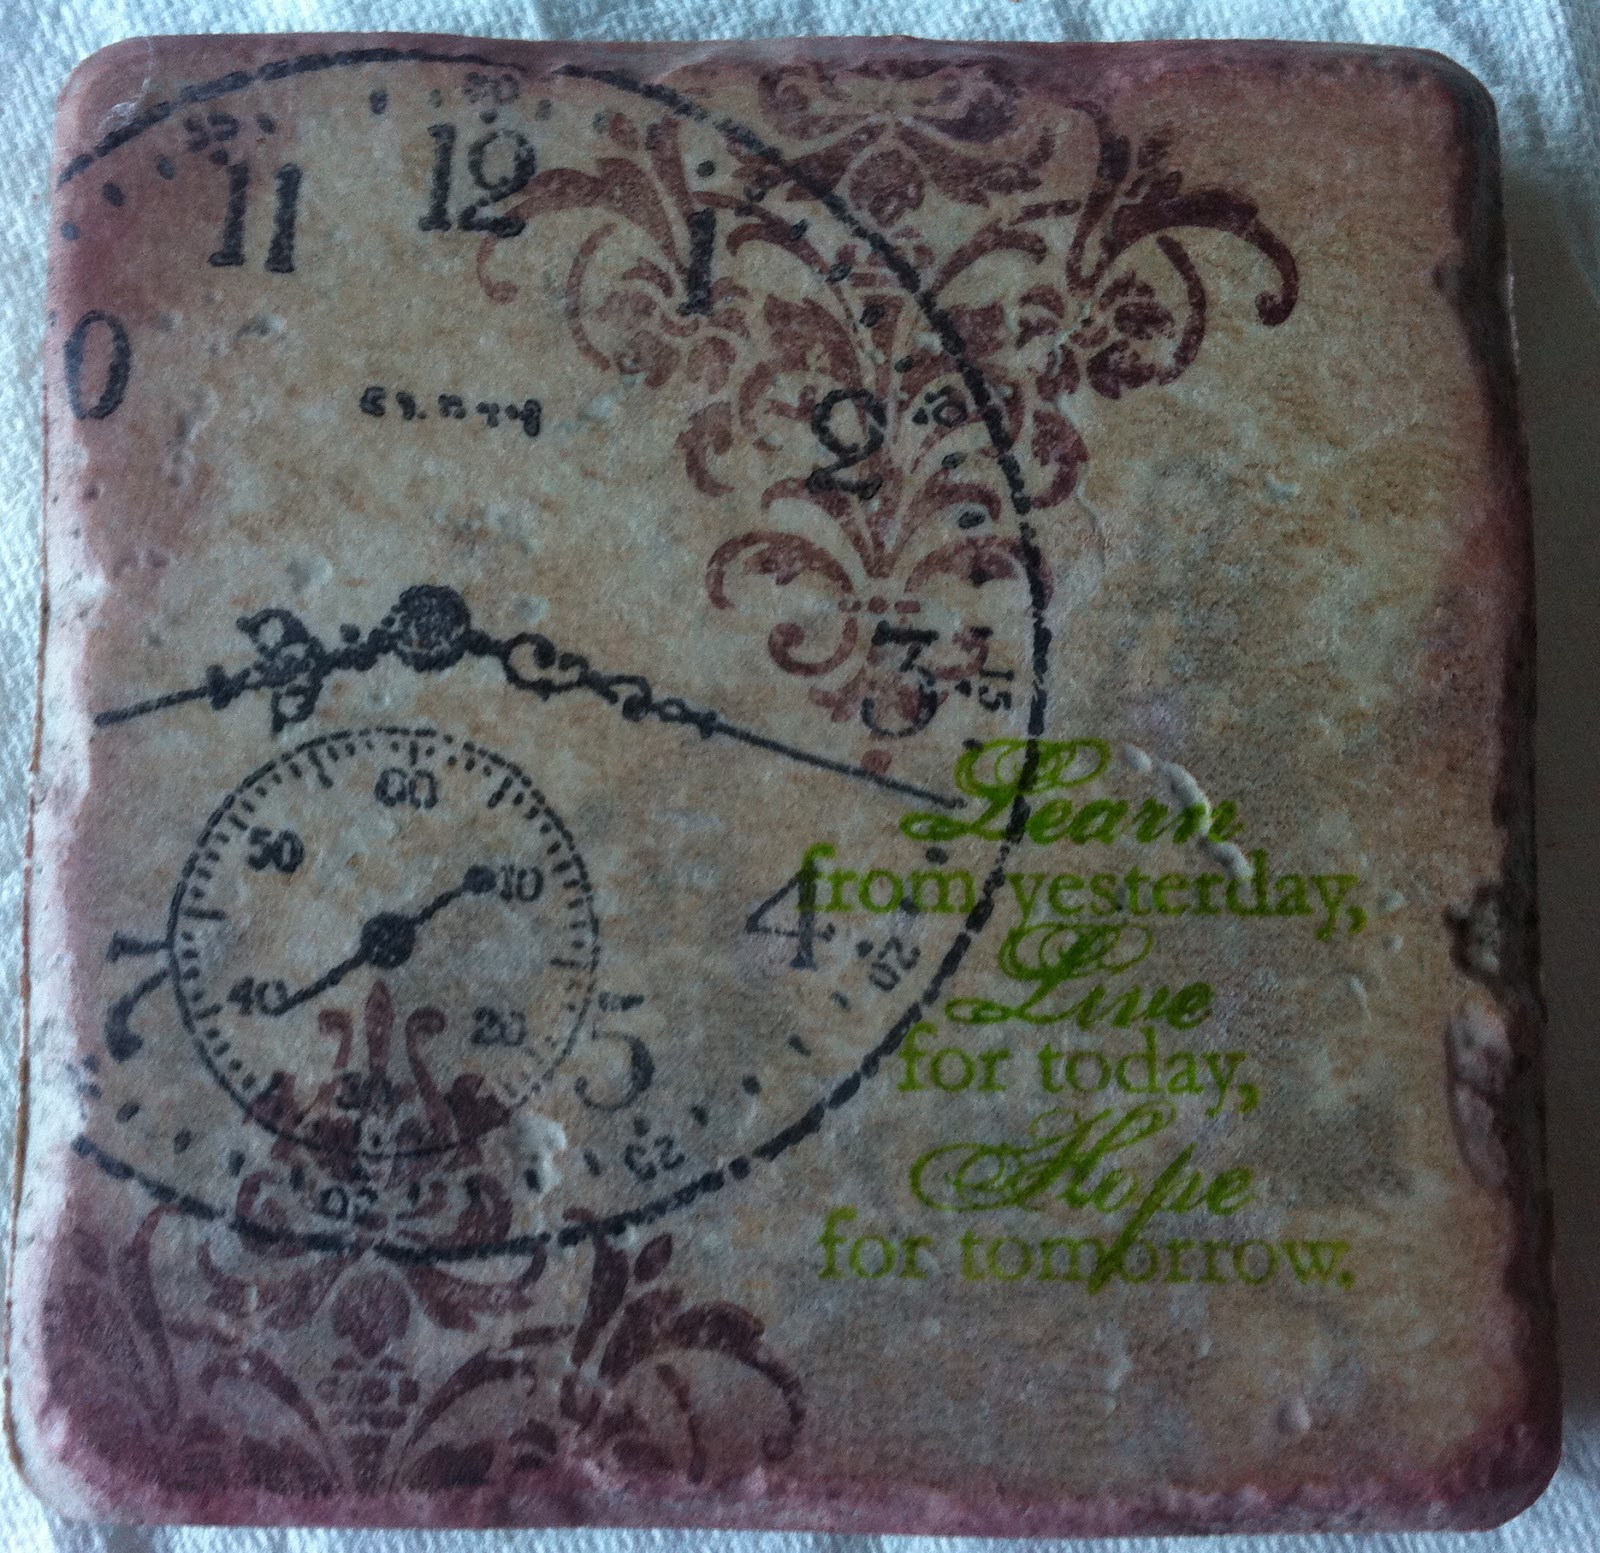
I'm back with another home decor inspirational share. I really like getting the most out of my craft supplies.  And to be completely honest, so does my hubby.  He finds a lot of enjoyment out of my home decor items that I created using my supplies.  Even it I got the idea from somewhere else, it doesn't matter, it's just super cool I can make nice stuff for our little home.  With that in mind, I thought I would share some coasters I made a little while ago with you today.

I love them.  Just love them.  I made a matching set of 4 with marble tiles that I got from the hardware store.  The hardware store sells them in boxes or separately for very cheap.  So when I went I got a whole box!  You can get ceramic or marble, and I have made coasters using both ceramic and marble - I like the ceramic ones better, the rough surface is easier to work with and in my opinion looks better.  But never the less, I love how these turned out.  These were also made with the intention of trying out a new stamp set I had gotten from Stampin' Up!  I love the stamp set, I love the coasters, I'm just in love with them.  Every time I look at them on my table, I am happy.  I got the idea from this Tile Coaster Tutorial over at SplitCoastStampers.  Oh, and the beauty?  All 4 took me about 15 minutes to do!  I LOVE IT.  Super fast and easy!  And in case you are wondering, yes they are color fast - I have soaked these puppies and wiped them dry and the ink doesn't go anywhere.

Supplies:  Marble Tiles; Ink (Staz On Timber Brown, Staz On Jet Black, Staz On Cactus Green); Stamps (Stampin' Up! Sense of Time)

Friday, January 27, 2012

A New Beginning: Art Journaling

I know that I have been missing in action lately. Primarily because my life has just been that out of control! But have no fear I will be posting and updating regularly again and plan to be on the ball by the end of the weekend! With that said, some of you may be wondering what I have been up to. Well let me share:


This page is not finished.  I'm waiting on some new crafty goodness to get here, AND the journaling prompt is very personal and not very appropriate to share.... which leads me into why I've started Art Journaling....

I have been thinking of starting an art journal for some time. I am in love with the idea and it aligns nicely with many of my life philosophies. I love my scrapbooking but sometimes there are thoughts and feelings that just. Don't. Go. In. Scrapbooks. They are personal moments of thought. And well I used to keep a journal but to be truthful no matter how cathartic I found it if I have to choose between time writing even more and crafting I'll choose crafting. No questions or second thoughts! So I decided that an art journal in which I combine both journalist and art would be the best fit for me.  If you are curious about this, I would suggest checking out the lovely and talented Rachel over at Artful Evidence.  She was a huge inspiration in my trying my hand at art journaling. 

Supplies:  Paint (American Crafts, Apple Crate, Golden Gel Medium); Ink (Tsukineko Staz On, Ranger Archival Ink); Stamps (Stampin' Up! Sense of Time, Hero Arts); Sizzix (Tim Holtz Alterations Gadget Gears);  Tissue Paper (Celebrations)

Sunday, January 8, 2012

I'm Back!

After 6 weeks of being away and spotting posting, I am back! Spending time with my family was wonderful and filled with fun and happy times.  But at the same time, I am glad that vacation is over and things can commence as "normal."  With that, when I arrived home late Wednesday night, I have several packages waiting for me.  I'll be honest I did not take a photo of the packages, which I normally would have done because I was too tired.........  None the less, I did want to share some of the beautiful crafty goodness that was awaiting me.  Here is what was in one of those packages:

That's right the stick pins I received from the swap I did a little while back.  You can find my pins in this post. Seriously, I was so overjoyed when I got these.  This little package really brightened the end of my long and emotionally draining day.