Showing posts with label Organization. Show all posts

Friday, August 10, 2012

Spellbinders + Storage = Crafty Love Fun

I have been posting a lot of layouts and cards lately, which I know is the reason that you stop by.... and today I wanted to share with you how I store my Spellbinders and other similar dies.  An important thing for me these days is compact and highly accessible storage - living in the Bay Area doesn't really compute anything else.  I originally stored all my dies on Cling Mount Foam Sheets with magnet sheets all held inside one of my binder boxes.  For whatever reason, I hated it.  Just loathed it with a passion all it's own.  So, while I was surfing the internet trying to find a better way to store my dies other than hanging them using various peg type dealies on the wall, I found Becca's website in which she details her storage of die, here is the link to her place: http://www.amazingpapergrace.com/spellbinders-storage/.  I loved it!  Even the awesome labels, eventhough I am not that motivated or organized.  Either way, based off of her sharing, this is how I store mine.

1.  Grand Nestabilities
As you may already know, Grands are very large, and definitely will not fit into something like Becca's system.  Neither will they fit into CD/DVD cases.  So for those, I kept the packaging that the Grands came with, and simply added 8x10 magnet sheets to the back of the image sheet with the different dies.  This way I know which dies are which (meaning their names) and on the back side they are stored.  Here are some photos:


 2.  Nestabilities, Sizzix Framelits, PaperTrey Ink Dies
For the rest of my dies, which are not nearly are HUGE as the grands, they are stored in either empty CD or DVD Jewel cases.  I got my DVD cases from the same place that Becca got hers at a very reasonable price.  The CD cases I already had from the several PTI stamp sets I have before they started switching over.  All of these cases are stored in a Really Useful Box storage box, and as you can tell, it holds quite a few.
Each CD jewel case can hold two sets of spellbinders - as long as they are not too long (like the Long Rectangles or some of the labels sets).  If it is a large set, one jewel case will hold one set.  This is what is looks like.
 Each DVD case will hold two large sets as well.  I also store my scalloped and inverted edge nestabilities in these - mainly because of the way they are designed, stacking them inside one another isn't possible.

Tuesday, February 28, 2012

Real Photo Box and Embossing Folder Storage

Storage is something that I always struggle with and am always looking for new and better ideas.  Recently, I decided that I needed a more reasonable way to store my Embossing folders, plates, and cutting related things.  I had been storing them in these awesome little photo thingys that I had altered.  However, creating the inserts for the folder to hold my embossing things was very time consuming and cumbersome.  And I do not have time for either of those words in the same sentence right now.  When I decided it was time for a storage change, it was really late at night, like super late, like 2 a.m. late.  Despite that, I came up with a super awesome, fast and easy way to store all my stuff.  I made a box using chipboard, my Bind-It-All, paper, and Ribbon.  And this is the finished product:

It fits nicely where I need it to, it holds everything that I have and is very easily expanded.  The coolest part is that I didn't have to purchase anything from it, and I finally used something from the DCWV Real Photo Paper Pack that my dear, sweet, and supportive husband insisted that I have so much he bought it for me despite my objections.  Sigh.  I hate to admit that he was right, and the stack does on occasion come in handy.  Sigh.  So how did I do it?

I took 3 pieces of 12x12 chipboard and cut them into 6x12 lengths, and glued two together.  I did that for each side that I needed.  Next, I adhered the paper to one side.  I then punched centered holes into all of the pieces on three sides.  One of the large pieces I punched centered holes on all 4 sides, this is the piece that goes on the bottom.  Last, I weaved ribbon through the holes in a criss cross manner to bind them together.  Start to finish this took me about 3 hours (I am a slow worker).

Sunday, February 26, 2012

My New Storage Love

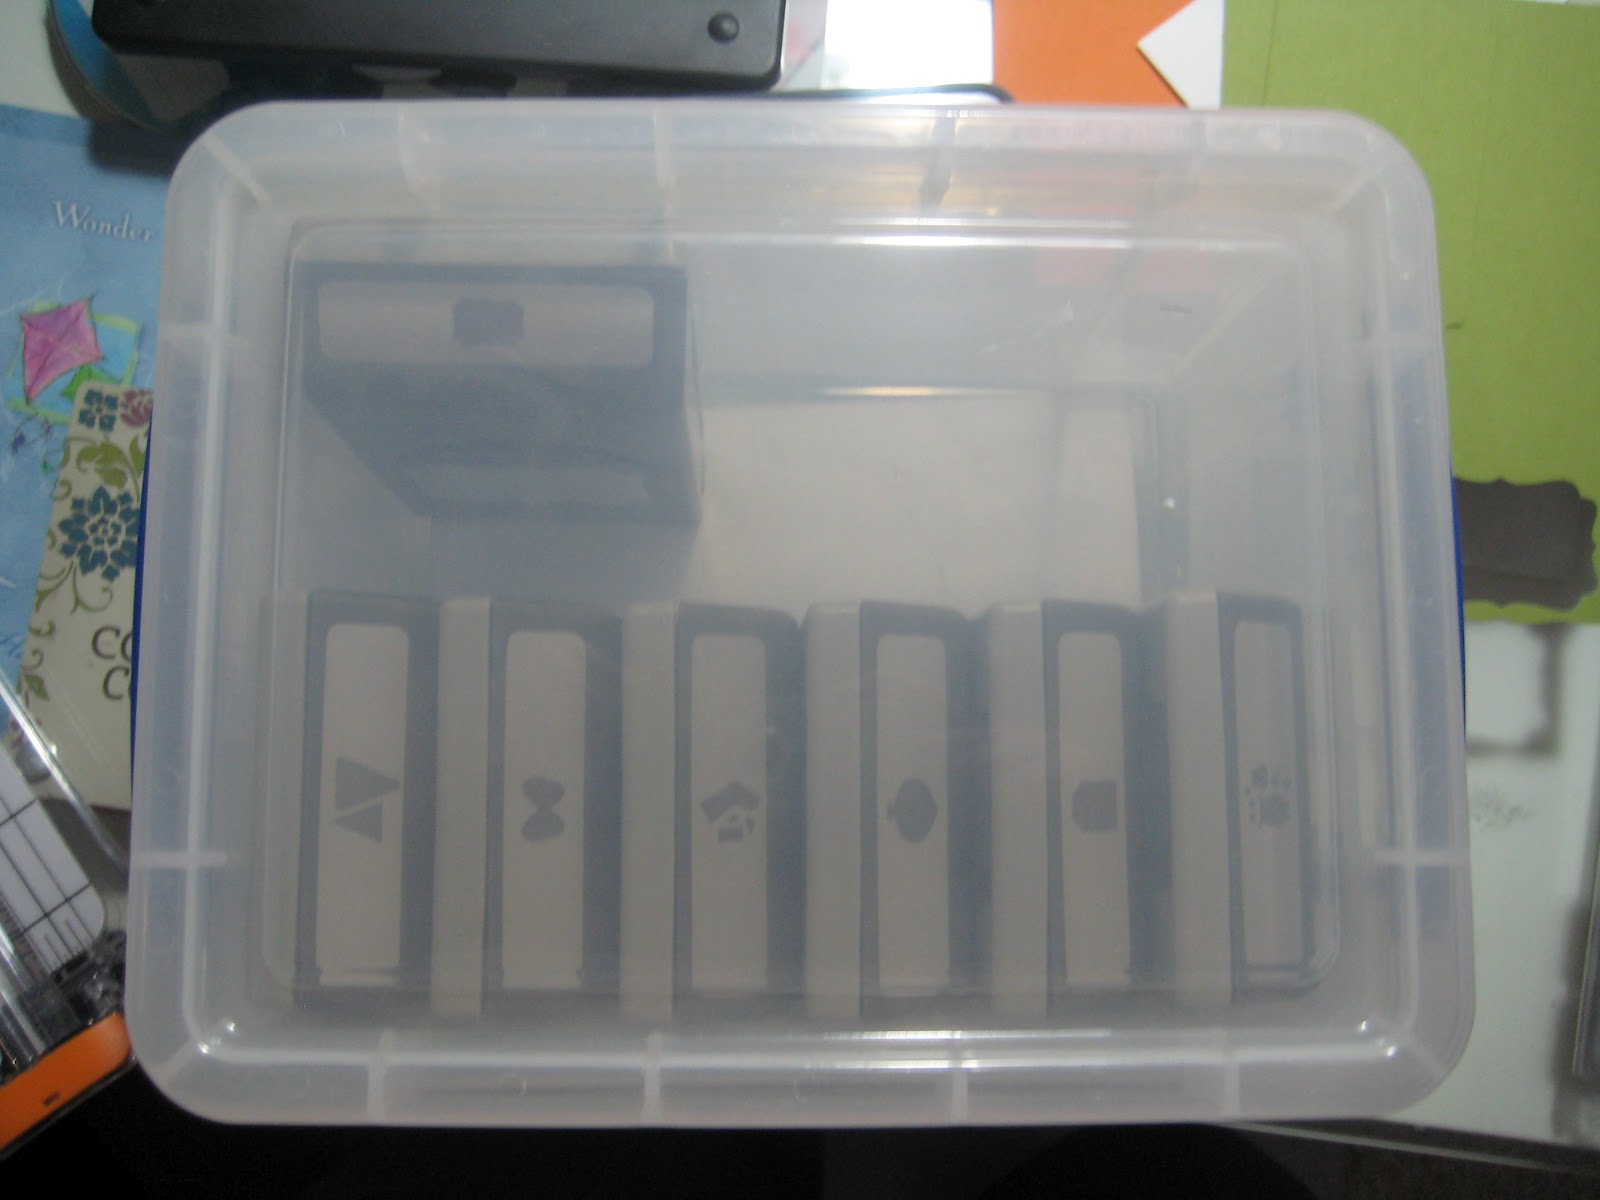
Today, I thought that I would share with you my new found love for an awesome storage unit.  Really Useful Boxes.  Not only are they really useful boxes, but that's also their name, so fitting seriously.  Why you may ask. Well I have been looking for a more modular storage system in order to condense all the junk I have (and it's a lot) but still have it accessible and organized.  While scouring the internet, I ran across another blogpost (but can't remember where or find it now) in which the person was using these boxes. I immediately went to the hardware store here and got some.  And let me tell you they are fabulous.  Here are pictures of what I am storing and how it looks:

This is a 4L Really Useful box, as you can see, it will hold probably 6 of the large Martha Stewart Punches, and 9 of the small edger combo ones.
 This is another 4L Really Useful box, the same size as the one above.  And it will hold 17 of the EK success edgers nicely.  I don't have a whole box full at the moment, but when I do, the Fiskar ones will probably find a new home in another Really Useful box.
 This is a 5L box, it'll hold my guess 8-9 of the EK success deep edger punches.  There is about an inch or so gap between the top of the punches standing up and the top of the lid, it's a perfect fit.

 This is a 3L Really Useful Box, and it hold all my Stampin' Up! Large punches.  I have a few more spaces before it's full, and I am estimating that it'll hold about 10 of these same size punches. 
 This is an 8L Really Useful Box (they say it's for shoes) that I am storing my  Sizzix Dies in,  I currently have 5 of the Large Dies and some smaller ones.  This box is a perfect fit for the large square dies, and as you can see, can fit probably about 15 of them.
I am seriously in love with this company.  Their boxes are all made to fit together and stack, and their dimensions are perfect for many of my crafting items.  One of the things that was important for me was to have the perfect fit but to have my punches standing up, so I can easily see the punch image.  These boxes are also fairly reasonably priced not on sale.  I believe the 8L box cost about $8.99 before tax.  Another really nice feature is that the handles on these guys lock in place but are not difficult to unlock either.  Either way, if you're looking for more stackable and modular storage, this is definitely recommended by me.

Monday, February 13, 2012

Stylish Pin Storage

Today, I am going to start off talking about Mini Album Swaps (of course, what else would I talk about?)  One of the swaps that I have been participating in fairly regularly is the Stick Pin Swaps.  A stick pin swap is basically getting some pretty floral pins, adding beautiful beads to them and then swapping them.  It is a lot of fun, and gorgeous pins are everywhere in scrapbooking right now.  And to be honest, you can make tons of different stick pins with very minimal supplies - so it's a fun, cheap embellishment as well.  With that said, although I have only done a few of the stick pin swaps (2 at this point) I have TONS of pins already.  And the pins are just beautiful, so I wanted them to be visible.  Thus arouse a need for a stick pin pin cushion. But it could not be any pin cushion, it had to be a beautiful one, that fit my style and decor.  I wasn't quite sure how to make them, so I did some research, and came across this YouTube video.  Watch it, it's totally worth it.

And this is what I came up with:


 And a close up of all the beautiful embellishments


Rather than using fiber fill, I used some decorative sand that consistency of emery sand from michaels.  They sell it in the floral department.  It is heavy and thick so it holds my pins nicely.  I got everything I used on coupon, and still have enough sand fill to make another pin cushion!

I have to be honest, this little guy took me a while.  After placing the silhouette piece on I wasn't quite sure what else to do, but it definitely looked very unfinished and ugly.  But it sat on my shelf waiting for the right inspiration.  Well a few days ago while digging through some of my stuff, I found that little Carpe Diem tag and thought it would go perfectly.  I had had the beautiful feather pin already in mind, but it didn't go well with what I had so it too sat.  However, once I put the tag on, everything fell in to place and I had a finished pin cushion.  I am so happy with the way it turned out.

Supplies: Mini Brown Bucket (Michaels); Brown fabric (Joann's); Green and Brown Trims (from my mother); Flower (Prima); Silhouette (from Korean Market); Feather (Feather Accents); Metal Tag (Creative Imaginations); Bling (Michaels)

Sunday, February 5, 2012

Stampy Goodness and How I Store Them

Let me start off by saying, I love all stamps.  But I prefer some storage methods over others.  Specifically, I like ALL UNMOUNTED stamps.  Seriously, I have an allergic reaction to wood mounted stamps.  Part of it is because I can't see through the blocks, that drives me nuts.  But also, wood mounted stamps take up mass amounts of space.  Huge. Amounts. Of. Space.  And I do not taking up more space than is absolutely necessary.  I've shared with you before how I store my stamps, but it wasn't a very effective post... So, let me share with you again, in more depth.  And show you how I unmount my wood block stamps.

How My Stamps Are Stored:

I store my stamps in these guys .  They have several different styles and sizes.  I found that the larger ones fit my needs better and the inserts that go inside are 8.5x11.  They are totally enclosed binder boxes so that if your stamps ever fall off the cling (which they don't) you don't loss them.  They will stay safe and secure inside your binders.  And as you can see, I store my stamps by Manufacturer.  In order to keep track, I have a Stamp Index (2 now) in which I have indexed my stamps by theme and stamp the image in each corresponding theme.  You may be wondering how many each binder can hold..... that depends on the thickness of your mounting foam/Acrylic Stamps.

I have 6 sheets with stamps on each side with paper divers between each sheet in this binder.  And it closes perfectly, snug but perfect.


My foam mounted ones can fit 4 double sided pages per a binder.  This binder particularly holds my stamps from Unity.  Unity Stamp Company has full 8.5x11 sheets of stamps that they sell, and I can fit one whole sheet on each page.


The stamps themselves are stored on EZMount Lightweight Storage Panels.  It was cheaper and easier or me to purchase them rather than buy chipboard and laminate it.  I have also seen options in which you place the chipboard in sheet protectors.  There are a lot of options for creating these Storage Panels, and for purchasing, this was just the option that I went with and am very happy with.   

I like to be organized, and see what's in each box, so on the cover, I save all the stamp inserts and such and put them on the cover of the binder that they are in.  Just like this:

 Now, just for the record, not all of these stamps come as clear mount (meaning use with an acrylic block).  Sometimes I do have to unmount my stamps from the block and change them over to static cling.  To do that, you need the following supplies
  • Microwave
  • Sharp coated scissors with a good point on them such as Tim Holtz or Cutter Bee.
  • Static Cling Cushion (EZMount by Sunday International, or Hambo)
    • Just a note.  Hambo is much much cheaper than the Sunday International brand.  I have never used it, just made my first order, I'll let you know how it goes)
  •  Goo Gone - to clean your scissors after you're done.
 
1.  Heat your stamps in the microwave, I put mine in a glass dish first, just so that it makes it easier to handle them.  You will want to cook your stamps for about 1min30 seconds.  This is to heat the glues that hold your stamp, cushion, and block together.


2.  Next, you will want to peal the stamp fromt he block, and then peal the cushion from the stamp


 3.  You will place the unmounted stamp onto the sticky side of the cling cushion.  With the Image side up.  I generally do a whole bunch of stamps at the same time, or a sheet at a time.


 4.  Once that is done.  You will cut around the stamp.  Make sure to not cut into the image.  And you need to cut straight.  Meaning, do not cut the excess foam off at an angle.  If you do, the foam will not completely cover your stamp.  This leads to uneven pressure when you use your stamp which means wonky images.  This is the stamp in which your scissors will get gooey and ewwy.  That's okay, it'll clean up.  Some people dust the stamps and sticky stuff with baby powder to reduce the stick.  I didn't notice a different.
5.  Last, you flip the stamp over, and peel the backing off - this is the side that has the static cling to it.  And it is ready to store!


Saturday, November 5, 2011

Handmade Day Planner/Life Organizer/ Day Runner

I'm back!  This time, with something a little different, okay, maybe a lot different.  Some handmade projects (well the first of two I will be sharing currently).  And I have to say that I am very very very proud of this one - although it is a prototype, and will be going through improvements the next go around. What is this lovely project you may be asking yourself.  Well..........

TADA!  Can you guess what it is?  I was very proud of myself, this cover was made by my hands, I took pices of chipboard cut to the dimensions that I wanted, and then adhered to a beautiful shopping bag that I received from a LSS when I purchased supplies months ago (I recycle everything, that how I ended up with the ever so enduring nickname "Little Indian" from my husband).  Also, the cool thing about this..... It has a plastic cover on it, to protect it from getting ripped, beat up in my purse, and wet (any guesses as to what it may be?)  How about another clue:

Any guesses?  Okay I'll just tell you!  I made my own planner!  This is what it looks like when I open it


On the right side is the organizer, and the left side, is a mini brag book - primarily because people always ask me about my husband, want to know what he looks like, you know the drill.  And I never have photos!  Cardinal sin of a scrapbooker really.  Here is what the left side looks like


Really it is a six page mini album incorporated into my Day Ruiner Runner.  I was also able to use up a good portion of my stash in this project which was a plus.  And the right side:


 I planned it so that when you open it, you get a whole month view for the year, where I can put special dates, vacations, etc.  Once you flip through that, before you get to the weekly spread, you get this page to the left.  It has holes I cut into it, where I slipped a split pack of sticky notes, and some place markers.  Very useful for a day planer may I add.  I got the idea from Kathy Orta, she has a tutorial on her Ustream, but the sample item is found here.

After this little holder page, you come to the weekly planner part.  I created the planner pages and printed them at home after looking at several examples and picking out what would and would not work for me and then combining what would work for me.  Each week is a two page spread - the left side is the date/appointment keeper, and the right side is a to-do list style for each day of the week.  I also have places to put notes. Jot things down whatever. 

And this everyone, is my super awesome day planner.  Overall dimensions are made to fit 8.5x11 pages - which is what my planning pages are.  The mini book on the left side is slightly smaller in order to fight nicely inside.  The overall book dimensions are 9 W x 11.5 L x 1.5 D.  And honestly, the only thing that I can say is that this planner rocks, and I am so proud of myself for making it entirely with my own two hands.  Scrapbooking Industry 2, Scrapbooker 1, Day Runner Company 0.

Again, if you want tutorials, love what you're seeing, leave some love and let me know!  I always appreciate comments, they warm my little beating heart!


Supplies:  DCWV, Tim Holtz, Chatterbox Inc (Patterned Paper); Bazzill (Cardstock); Martha Stewart Scoreboard; EK Success, Stampin Up!, Spellbinders Labels and Nestabilities (Punches, labels); Stampin Up! Butterfly Prints (Stamps); Basic Grey (Rubons); Me and My Big Ideas (Dimensional Embellies); Binding (Zutter)


Thursday, October 27, 2011

Scrappy Area


As some of you know, the past few months have been months on transition and stalled transition.  A move from our little home, to my mothers, to California all within a 4 month frame.  I can honestly say that my little bit of scrappy heaven space has suffered greatly. I've gone to my own room, to an unused room, and a shared space.  This particular photo was taken mid crafting between projects.  It's not ideal, but it is still a crafty and creative space.  The best part.... that bookcase.  I'll be honest, I LOVE LOVE LOVE the expedit cubbie bookcase.  It's got some nice design elements, but I can put all my stuff into boxes and straight into the cubbies creating a streamlined clean look.  Heaven.

Thursday, January 20, 2011

My Coloring/Spray Adhesive Station

Okay... so we all know that this is an issue.  Glimmer Mist.  Acrylic Paint.  Spray Adhesives. Basically anything dealing with the liquids of papercrafting.  I am talking mess containment here - nothing more maddening than accidentally getting over spray on those photos you (meaning I) just printed, that layout that is almost done, or that piece of whatever that you (meaning I) did not realize was there.  I've tried those flat mess mats - but honestly it's a pain and doesn't really control overspray and such.  It just protects the surface under the mat.  Are crafters able to keep the mess contained to that small area anyway? And I don't have a dedicated wet station area to keep the mat at - not that I would need it if I did.  Thus I have rendered those mats USELESS and cost inefficient.  Enter MY SOLUTION.

Some places (and companies) have started to sell a partial cardboard box to catch the oversrpay and stuff.  What I like is it's portable - you can stash it when not in use, take it out when needed, place on top of whatever, and mess. is. still.contained!  Well my version, was FREE.  That's right FREE, and from a department store no doubt.  Yes, that little mess container is a large garment gift box.  And THAT is my little wet station.  Nice thing is that with each box, you get two mess stations.  so if for whatever reason you misplace your first station, you always have a second.  =D

Thursday, September 30, 2010

Paper Scrap Storage

If you're anything like me, you have more paper scraps than you do everything else in your arsenal combined.  Well I can be very thrifty sometimes, and wanting to be as green friendly as possible, I shrink at the idea of throwing away paper scraps, besides my paper is so pretty!  Well, I always need storage that will keep my scraps open and available to me.  So, this is what I have done.

1.  Photo Box turned Scrap saver
    • I converted a photo box into my scrap saver box.  I just cut some tag board to the dimensions of the box for each color in the rainbow plus one for white CS, black CS, vellum, journaling paper, and cream CS.  I then took my handy dandy Fiskars medium circle punch and punched a circle (out of my scrap pieces of course) for each color that I wanted to have  section.  I adhered them to the piece of tagboard so that I could see them.
    • Any piece of paper 10x4 or smaller goes into this box 

    2.  Iris Scrapbook Carrier
    • I did the same thing for this one, a piece of scrap paper for each designated color was cut to fit inside of a filing tab.  These were attached to the large hanging file folders that Iris makes for their scrapbook box.  Anything that won't fit inside my table top box, goes here.  
    • The nice thing about this box is that it has a nifty tray that fits on top, you can put tools, or like I do, all my thin long pieces that turn into journaling strips.  It can all be locked together and carried away!

    What I love about these ideas, well I know exactly where to find which color now.  Easy to find AND easy to file!