Showing posts with label Paper Projects. Show all posts

Friday, February 3, 2012

Swaps, Swaps, and More Swaps

I love swapping, it really is a lot of fun, and a cool way to see new and different ways of doing the same thing.  Just love it.  As you all know, I've been spending a lot of time swapping over at Mini Album Scraps.  The last round, I participated in the Stick Pin, Flower, and "CREATE" word banner swap. And so, today, I thought I would share with you all what I have created! Grab some coffee, tea, hot chocolate, whatever your poison of choice and continue on..... It's a long post with lots of pictures today!

1.  Stink Pin Swap
I love stick pins, really.  And this particular go around, I was excited that it had the theme of Love/Valentines Day. I haven't always been so excited about Love/Valentines Day month, but to be honest, it is a holiday that tastefully surrenders eloquently to crafting girly style.  With that in mind, I went with the colors of love, well mainly Red, Brown and Cream, with some black thrown in.  Here is the finished product:
 A little bit of a confession:  I've been collecting Valentine's Day themed stamps and such for age with all these glorious plans for them that are never really executed. Either way, this is the first time that I have ever used the stamps for the tag!  Even better is the fact that the base that the stick pins are adhered to is corregated cardboard I pulled from the trash. Yes.  The Trash.  I just took of the surface from one side and added some Glimmer Glam and acrylic paint.  It gave it a shabby chic grungy look.  I love it.

And the close up of the stick pins:

 Check out those pins!  I love them!  For this particular round, I got some really pretty specialty beads.  My favorite were the heart charms.  I just loved them!

Supplies: Tag (Cardboard from trash); Cardstock (Bazzill Raven, Bazzill Pomegrante, Recollections Kraft); Stamps (My Sentiments Exactly, Studio G); Inks (Stmapin' Up! Cherry Cobbler, Chocolate Chip and basic Black; Tattered Angels Glimmer Glam; Pearlesent Pearl Paint); Stick Pins (Corsage Pins from Michaels)

2.  Flower Swap
Ever since I got the Tim Holtz Tattered Floral die, I have been on a "create my own flowers" kick.  And let me tell you, it is soooo much fun!  I know that I've said it before, and I'll say it again, if you do not get any other die you NEED this one.  I made all of these flowers from the same die:

 And some close ups of each flower:
These are a paper flowers.  I made these modifying a tutorial a bit to fit my needs.  The flower tutorial can be found here.  Before assembling my flowers, I inked all their edges, after they were assembled I took a toothbrush dipped in acrylic paint and added some color.  I think they turned out fabulous.
 These are a paper and aluminum foil.  This is just the standard rose that there are a bazzillon tutorials on, each is the same.  Just google it and find one that you get.
 And these (by far my favorite) are made with coffee filters.  You can find the tutorial here.
And the tag:

I kept the tag pretty simple so that it can be reused in another project.  The front has been covered in pattern paper, and the back is just plan for journaling and a cute little key stamp.  I sprayed it with some neutral colored Glimmer Mist and inked the edges.  The tag itself was cut from the Tags, Bags, Boxes and More Cricut Cartridge.

Supplies: Ink (Stampin' Up! Chocolate Chip, Stampin' Up! Early Espresso, Stampin' Up! Basic Black); Paint(Americana True Red); Tattered Angels Glimmer Mist Walnut Gold, Red Nose Reindeer; Paper (Michaels Recollections Kraft); Patterned Paper (Recollections Stitch in Time); Cricut Tags Bags Boxes and More Cartridge; Stamps (Studio G)


3.  "CREATE" Banner
I seriously have a deep love for banners.  I never know what I am going to do with them, but I figure I might as well have a stash of them!  However, I am in the process of creating decorated spaces in my home where all the banners I am accumulating will go.  With that in mind, this month's banner swap was specifically for our craft space, and had the color scheme of Pink, Black, and White/Cream. Here is what I came up with:
Aren't they fabulous?!  I had such a fun time making these.  I got some awesome stuff for Christmas, and this was the first thing that I made following Christmas.  So I even got to play with some of my new supplies. And because we are always about the details, some close up pictures:


The hardest part about making these guys was trying to figure out how to use the Martha Stewart combination punches the edger and the corner rounder.   After some trial and error I totally got it, and if you want something else to add to your stash, her punches.  I am in love with them.  They are fabulous to have on hand!  The beauty of this project is that I used 4 sheets of 12x12 plus scraps from my scrapbox to make these all.  So not very supply heavy at all!  One of the benefits to making banners - you can use up all your random bits and pieces.

Supplies:   Bazzill Glazed, Bazzill White, DCWV Glitter Pack, GCD Patterned Paper, Recollections Pink Card Stock (Paper and Cardstock); Stampin' Up! Classic Ink (Ink); Gypsy Wanderings (Font); Cricut, Martha Stewart, Stampin' Up! (Punches and Tools); Prima (flower); Michaels Dollar Spot (Bling); Stick Pins were handmade.
Hopefully you have enjoyed my shares, and feel inspired to do some creative crafting yourself!

Tuesday, December 6, 2011

Work in Progress Share: Calendar Swap

Following in my current trend and love affair: swapping- here is another fun share.  I am still working on these, which let me tell you has been a feat because of my limited supplies right now.  But none the less, I am loving the outcome.  I am responsible for the months of November and February - both of which I love, mainly because I love doing fall and love themed paper piecing.  So here is what I have so far:


 I had to do a color theme of Black, Creme, and Beige with one color of my choice.  For the February one, I choose red (of course, what else for February?).  And for the November one, I choose "orange" - okay I cheated a bit and choose red and orange.  Here are some close ups of my embellishments:


I love those flowers, so delicious.  The tutorial can be found here.  So beautiful!  Another thing, I loved: the background on my November calendars.  I stamped that in different shades of beige and a burnt orange with Paper Trey Ink stamps, and yummo I LOVED how it came out!

Supplies: Paper Trey Ink (Masculine Motifs, Mehndi Medallion); Close to My Heart (Air Mail); Stampin Up (Neutrals, Cherry Cobbler); Prima (Heart Stamp); Glitter (Stickles); Tree (Paper Doll Dress Up); Cardstock (Bazzill); Pumpkin (EK Success 1" Punch piecing); Maple Leaf Punch;

Wednesday, November 23, 2011

Wednesday Work in Progress: a mini mini

You could say that I am going through a mini phase at the moment..... Okay, maybe a big mini phase, but I can't help it, they are so much fun to do!  I can attribute this phase to Lindsay over at Scrapjazz.com - she started it.  Either way, I thought I would share a little mini that I am working on currently.  This little guy has been a work in progress for several months.  Not that it has been a hard project to put together - I have just been working on it as I get inspiration on the next steps. So here is the cover:

 It is a gate fold, that is held together with knotted and bowed ribbon in the front.  The right side of the album is about a half inch larger than the left side so the longer piece actually keeps the smaller piece down when it's tied.  I really like the knotted bow in the front, it adds so much detail and character.  Just love it.  And that paper, is just yummy with this project.  And the insides:

Everything on the inside is using scraps of paper from my paper box.  Even the journaling strips are scraps left over from larger bits. (one of the cool things minis are good for).  The "pages" themselves were all left over chipboard pieces that I had - thus very little trimming involved!  As you can tell, the inside is still pretty simple - this is the work in progress part.  I still have to do the journaling, embellishing, etc. And I'm not quite sure what type of theme it is going to carry all the way through.  The photos are all of me and hubby while we were dating and span a good year.  So, until I feel "inspired" again it will sit like this.


Tuesday, November 15, 2011

Banner Swap Pieces

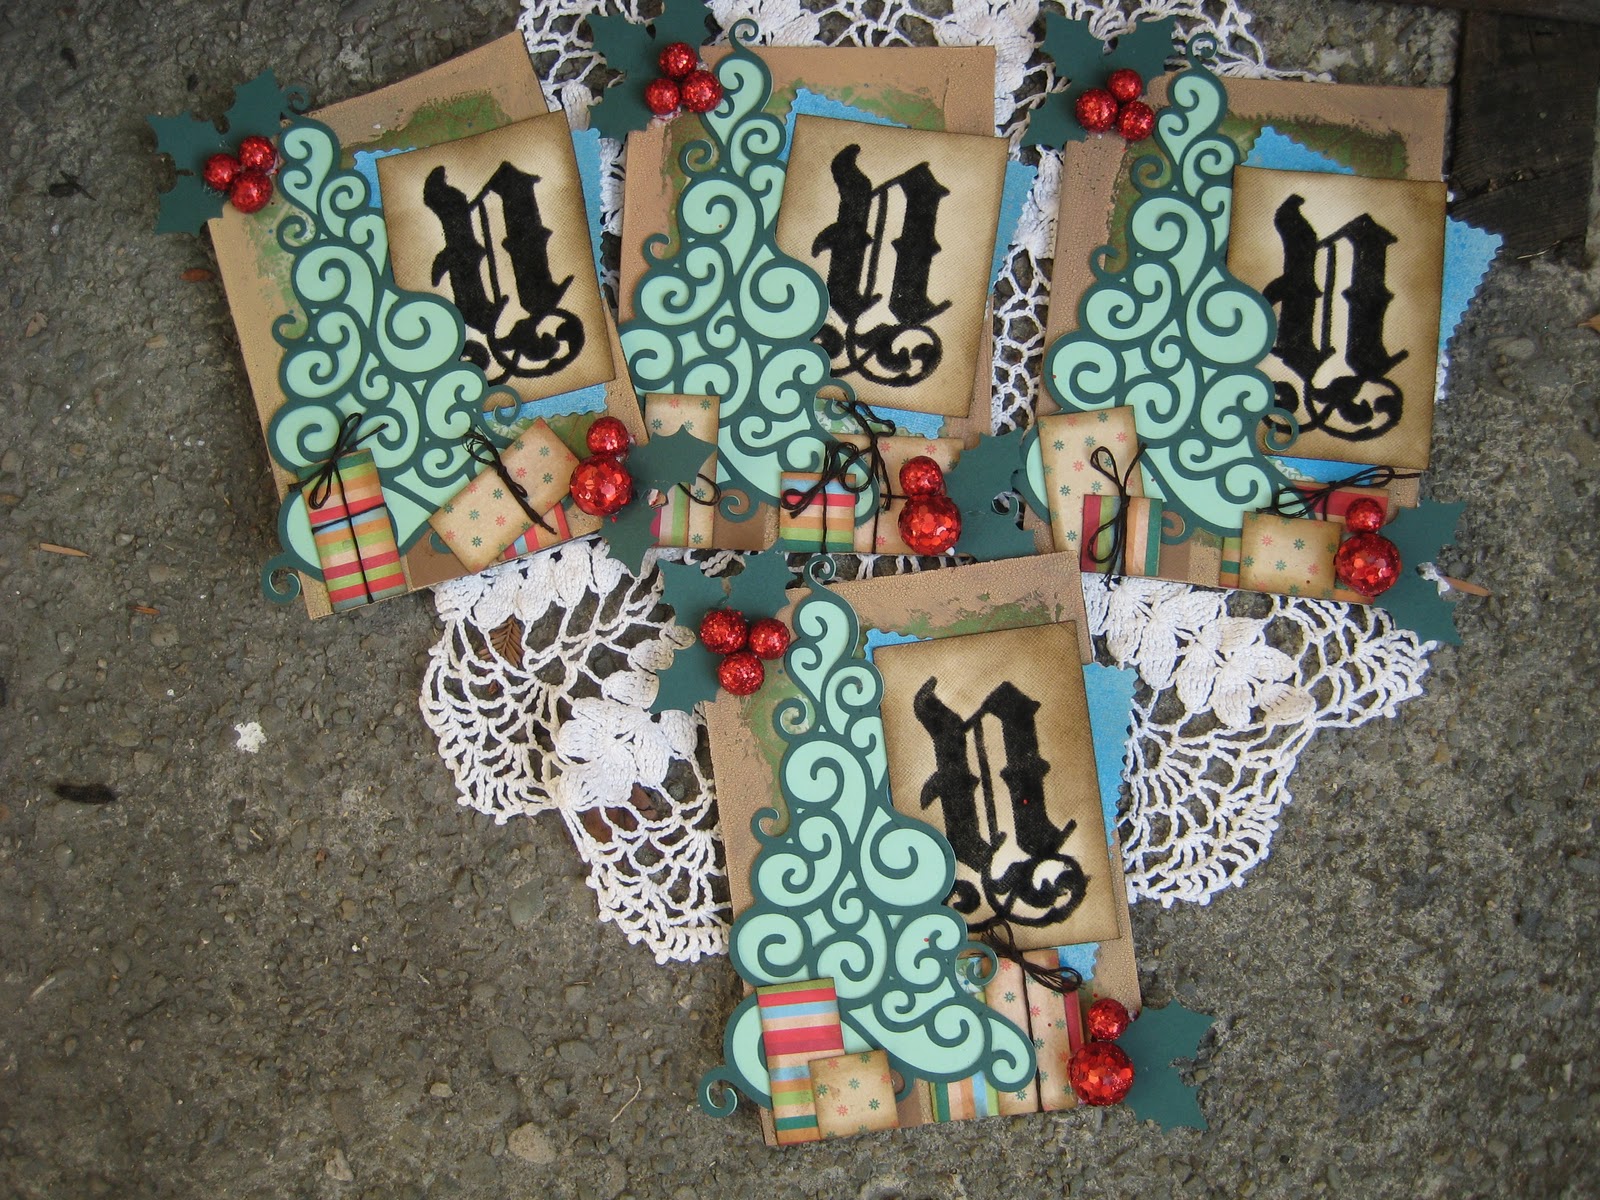
If you've been following my posts lately, you will have noticed a theme.  Swaps.  My current addiction, and I'm still loving it.  Swaps are a good way to find others to share your love of all things paper with, and who share with you as well.  You get different ideas, and ways of doing things.  Swaps. Are. Awesome.  Well, a while back, I joined a banner swap.  The concept is you pick a word you want made into a banner, than each person would sign up for a letter to make for that word.  You make several of the same letter (i.e. if you are making a "santa" banner and choose letter A, you would make 5 letters As keeping one for yourself and sending the rest to be divided) and once you send them off, you get the rest of the letters back.  I like banners, and my husband LOVES and I mean LOVES when i decorate the house with stuff like this, particularly for holidays, celebrations, and special events.  So I figured I could build up my banner stash.  The swaps I signed up for were for "Noel" and "Winter."  Each banner piece had to follow a specific color scheme and contain a minimum of 3 different types of embellies, and the letter had to be at least 3 inches tall.

This is what I came up with for the "Noel" swap:

And here are some close up details for your feasting pleasure:

 This was a very challenging banner piece to complete for me, but was definitely worth it.


For the "winter" swap, I came up with this:

 And some close-ups for the details:


 These were a lot of fun to make.  I think because I am a huge fan of the winter time.  I love the crisp cold air, hot mugs of cocoa, snow, and cute winter clothing.  I think my favorite thing on these are the mittens, it took forever for me to figure out how to incorporate them, then make them, but they sure are stinkin cute!

Thanks for stopping bye and sharing in my crafty pleasure!  Once I get the other pieces of the swap back, I will show you the entirety!

Supplies List:

Noel: Die Cuts With a View Holiday Paper pack (Patterned Paper); Fun Flock (letter); Medici Text (Letter font); Tim Holtz Crackle Paint; Making Memories, Bazzil (Cardstock); Christmas Solutions Cartridge (Tree); Winter Wonderland Cricut Cartridge (Holly Leaves); Celebrate it Foam Sequence Balls (Holly Berries); Tattered Angels Glimmer Mist; Tim Holtz Distress Ink

Winter:  Die Cuts With a View Holiday Collection Christmas Stack, DCWV Holiday Collection Winter Matstack (Patterned Paper); Bazzill (Carstock); Celebrate It Snowflake Ornaments; Flower Soft Ivory (Snow); Glitter; Tattered Angels Glimmer Glam Chandelier and  Pixie Dust (Poinsettia); Stampin Up! Ink; Making Memories (Button); Fiber (mitten strings); Yarn; Winter Wonderland Cricut Cartrdige (Poinsettia); Spellbinders (mittens)


Sunday, November 13, 2011

Home Decor and Wall Art


I love making handmade pieces of wall decor.  It's soothing, fun, personal, intimate, and well economical. So, today, I thought I would share some of the different pieces I have made over the past few years and hang on my walls.  I love them.

The first one, is a collage I made after my husband and I got married.  It is a slightly religious piece and focuses on the The Family: A Proclamation to the World, which is a little piece of revelation from the Prophet and his counselors of the Church of Jesus Christ of Latter Day Saints.  For me the family starts with the couple, all the love, respect, devotion, courtesy, admiration in the couple impacts and is reflected in the rest of your family or future family.  This is something that is important to both my husband and I and I wanted to capture it.  And this is what I cam up with:

 This project took a lot of time.  I had to measure, cut, layout and then glue down.  But it is also one of my most rewarding projects that I have. The paper I used in the background is actually large sheets of water color paper I got from michaels.  I used left over embellies from another project, and did a little bit of stamping.

This second one, was made as part of a National Scrapbooking Day challenge at Scrapjazz.  We were given a necklace from Urban Outfitters as inspiration for something.  And this is what I came up with:

I love it.  Always have, and always will.  It's whimsical, elegant, creative, inspiring, and touching all at the same time. The flowers were all made by me using wide pieces of ribbon.  I trimmed photos down to fit inside those Making Memories metal frames, and used some of Tim Holtz's fragments for the patterned paper pieces.

The third piece is a little bit of home I take with me everywhere.  I am a natural girl at heart, I love earth, trees, and no buildings.  It is grounding, inspiring, calming, and freeing.  When I moved to a California for school, I found myself far away from everything I love.  So to keep the homesickness at bay and improve my mood, I made this:


This last one was really more just for fun.  I was inspired by the stamps and wanted to try stamping with acrylic paint.  Again, it is a piece that I am just in love with.  Simple and fun, but a captured moment of bliss between my man and me.

I love this stamp from the Donna Downey Unity Stamp cobrand kits.  Just love it.  That bird, was paper pieced with handmade paper. 

I hope you enjoyed today's share and maybe found some inspiration for your own home decor and wall art!

Wednesday, November 9, 2011

Another Mini Creation


I have really been enjoying making my own scrappy albums.  Really, they are so much fun, and sometimes, I just want something small of a specific theme or event, or just a little creation.  I scrapbook for lots of reasons including memory preservation because some day I will get old and forget, genealogy because I want my future generations to know how I felt about my life that is on paper while I was living it, and most importantly Artistic Expression.  I cam late to self-expression and experience, so it is important for me to have an avenue (if not to another person, it will be to my precious paper!).  This is my next little creation
 A gatefold mini!  Isn't that PP just lovely?  And goes so fabulous with such a whimsical title.  Yummy yummy yummy.  Another added bonus, all the inside pages were done using stuff from my paper scraps! And the inside looks like this:

The mini has photos from all parts of mine and my hubby's relationship up until the point of when I made it.  They are just photos in which you are able to capture to emotion of the time - so really my favorite photos because they "feel" so real.  It is not quite done on in the inside - I still need to add some quotes to pages and embellies, but you get the idea!

Thanks for stopping by, and again, if you love something, leave a little love!  <3

Saturday, November 5, 2011

Handmade Day Planner/Life Organizer/ Day Runner

I'm back!  This time, with something a little different, okay, maybe a lot different.  Some handmade projects (well the first of two I will be sharing currently).  And I have to say that I am very very very proud of this one - although it is a prototype, and will be going through improvements the next go around. What is this lovely project you may be asking yourself.  Well..........

TADA!  Can you guess what it is?  I was very proud of myself, this cover was made by my hands, I took pices of chipboard cut to the dimensions that I wanted, and then adhered to a beautiful shopping bag that I received from a LSS when I purchased supplies months ago (I recycle everything, that how I ended up with the ever so enduring nickname "Little Indian" from my husband).  Also, the cool thing about this..... It has a plastic cover on it, to protect it from getting ripped, beat up in my purse, and wet (any guesses as to what it may be?)  How about another clue:

Any guesses?  Okay I'll just tell you!  I made my own planner!  This is what it looks like when I open it


On the right side is the organizer, and the left side, is a mini brag book - primarily because people always ask me about my husband, want to know what he looks like, you know the drill.  And I never have photos!  Cardinal sin of a scrapbooker really.  Here is what the left side looks like


Really it is a six page mini album incorporated into my Day Ruiner Runner.  I was also able to use up a good portion of my stash in this project which was a plus.  And the right side:


 I planned it so that when you open it, you get a whole month view for the year, where I can put special dates, vacations, etc.  Once you flip through that, before you get to the weekly spread, you get this page to the left.  It has holes I cut into it, where I slipped a split pack of sticky notes, and some place markers.  Very useful for a day planer may I add.  I got the idea from Kathy Orta, she has a tutorial on her Ustream, but the sample item is found here.

After this little holder page, you come to the weekly planner part.  I created the planner pages and printed them at home after looking at several examples and picking out what would and would not work for me and then combining what would work for me.  Each week is a two page spread - the left side is the date/appointment keeper, and the right side is a to-do list style for each day of the week.  I also have places to put notes. Jot things down whatever. 

And this everyone, is my super awesome day planner.  Overall dimensions are made to fit 8.5x11 pages - which is what my planning pages are.  The mini book on the left side is slightly smaller in order to fight nicely inside.  The overall book dimensions are 9 W x 11.5 L x 1.5 D.  And honestly, the only thing that I can say is that this planner rocks, and I am so proud of myself for making it entirely with my own two hands.  Scrapbooking Industry 2, Scrapbooker 1, Day Runner Company 0.

Again, if you want tutorials, love what you're seeing, leave some love and let me know!  I always appreciate comments, they warm my little beating heart!


Supplies:  DCWV, Tim Holtz, Chatterbox Inc (Patterned Paper); Bazzill (Cardstock); Martha Stewart Scoreboard; EK Success, Stampin Up!, Spellbinders Labels and Nestabilities (Punches, labels); Stampin Up! Butterfly Prints (Stamps); Basic Grey (Rubons); Me and My Big Ideas (Dimensional Embellies); Binding (Zutter)


Thursday, November 3, 2011

Mini Album Scraps Stick Pin Swap - My First Stick Pin Creations

By now, you all know.  I love Swaps.  So here is another swap, which I joined at Mini Album Scraps - which in case you are wondering, is a Disney World for papercrafters.  Seriously, so many beautiful and unique projects put together by some of the most talented ladies ever!  They are friendly, open, and welcoming.  And the best part: such clear and precise rules that are easy to follow which enhance your swapping experience.  Why do I put that there, well because if you have swapped at all, there is always the christmas grinch who ruins it for everyone.  (Off my soap box and shout out).  They are hosting a stick pin swap, and I have never done stick pins, and although I am unsure of what I will be using them on, I wanted to do it, so, I did.  And here is what I came up with!
Supplies: Krazy Glue (Adhesive); Corsage pins (Pin); Beads
Aren't they beautiful?!?!  I just loved how they turned out.  Just so pretty, Very simple, I know, and I have plans of more elaboration in the future, but nonetheless, I like how they turned out.  And as part of the swap, they needed to come with packaging:


The matchbook, I made by cutting a 3/5 Inch x12 inch piece of paper and then scoring at to have a half inch thickness (I placed foam in the inside below the snowflake border to place my pins in).  The snow flakes were put on a piece of acetate and then cut to fit in the window.  Fun, simple project that was really enjoyable.  If you would like a tutorial on the packaging, please leave comments and let me know!

Supplies: Making Memories, DCWV (Patterned Paper); Bazzill (Cardstock); EK Success Snowflake border, Marvy Uchida Snowflake, Carl Snowflake, EK Success Snowflake, Spellbinders Mitten Shapes, Spellbinders Label Four Die, Carl Tree (Punches); Unity Stamp Co (Stamp); Stamin Up! (Ink)

Wednesday, November 2, 2011

Quick Mini Project: My Version of the Sizzix Index Folder Die and Index Card Keeper

I like to follow blogs and company releases - mainly to fuel my addiction.  Well, this next project is the sample of utility and feeding my addiction.  If you are a fan of Sizzix (Like myself) you will have noticed that they are releasing a new scoreboard die - The Sizzix Scoreboards XL Die - Index Folder.  Yummo.   I NEEDED this die, Like badly, I hadn't even noticed that this little guy has not been released yet.  So I went looking, and was able to figure it out on my own using my handy dandy Martha Stewart Scoreboard.  I made a few changes so that there were holders on each side of the box (so the index cards would not fall out).  Now the reason why I needed this?  As some of you may know, my hubby and I are doing very long distance at the moment - I have started my PhD work, and he is finishing his military service.  So, while on my break, I will be joining him, and at his request, so should his favorite recipes that I make.  I DO NOT want to carry a huge photo box of recipes to and from our current states of residence.... just the favorites.  You know his favorite cookies, dishes, and the holiday must haves.  But at the same time, I wanted to be able to keep them together.  Voila, this was born:


I absolutely love the way it turned out!  But, I will be honest with you, I added the Patterned Paper, AFTER I have cut out and scored the blue paper.  This would work SOOO much better if you adhered them together (Or even used a single sheet of Double Sided) then did the scoring and all that.  Also, one of the benefits of the Sizzix Scoreboard dies, is they are meant to work with heavier materials (such as chipboard) that I was not able to do with this.  So eventhough I found a cheapy way of doing it, I will still be investing into the Die when it comes out.  Why you say?  Well I get lots of requests for my recipes - generally from the same people.  And although I protect my family recipes, this would be a great little inexpensive gift!

(If you would like a tutorial on this, please leave comments and let me know!)

Supplies:  Pink Paislee (Patterned Paper); Bazzill, Joanns (Cardstock); Stampin Up! (Ink); Spellbinders Labels Twenty-One, Labels 5 (Diecuts); Bleeding Cowboy (Font)