Showing posts with label Home Decor. Show all posts

Monday, November 5, 2012

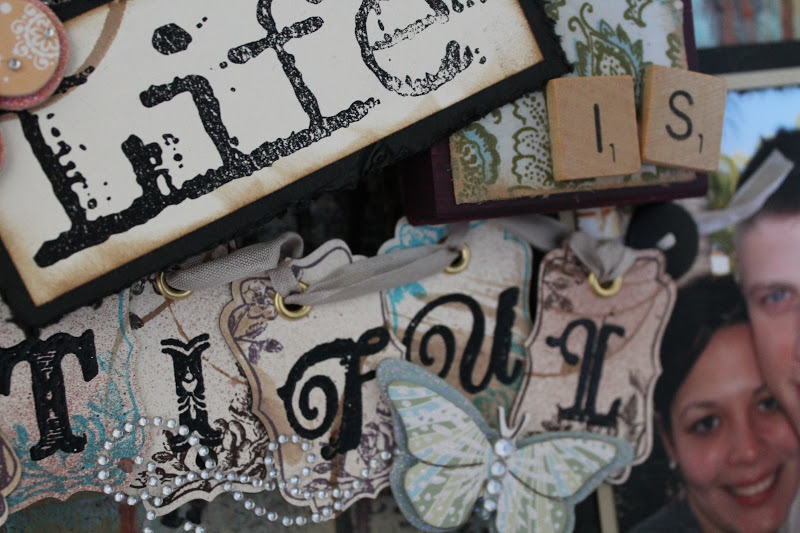
Life Is Beautiful Canvas

I am so excited to share a project that I have been working on for years mentally and months physically.   I got the idea several years ago while in a craft store in which the canvas had other canvases layered on top of it.  It was a beautiful texturie canvas - and the idea stuck and stuck.  Well fast forward years later and this is what that inspiration turned into:

 I built this canvas using the wood blocks from stamps that I had unmounted.  I never parted with them because it felt like such a waste.  This canvas is a 16x20 base, and the large wood blocks are little more than 4x6 (designed for background stamps).  Here are some close ups of the canvas:


Isn't it gorgeous?  I cannot even begin to express how happy I am with this project.  I have been working on it on and off for months, putting it aside when I lost inspiration.  Here is a video of this same project:


Thanks for stopping by, I hope you enjoyed your visit and have a happy craft inspired day!

(Supplies):  Tattered Angels Glimmer Glam, Tattered Angels, Glimmer Glaze, Tim Holtz Acrylic Paint, Jacquard Lumiere Paint (Inks and Pain); Stampin'  Up! Classic Ink Chocolate Chip, Stampin' Up! Classic Ink (Ink); Stampin' Up! punch, Stampin' Up! Four Frames Stamp set, Stampin' Up! Broadsheet Stamps


Sunday, November 4, 2012

What's For Dinner

I bet you are wondering why I am posting about Dinner in the morning on a crafty blog!  Well, I will share.....

 It's a menu board.  As both my husband and I are at school full time and our lives are even more hectic now that he is out of the Army - if you can imagine that.  I thought it was time to increase our communication about food plans by creating a menu board.  This was a super easy project to make and I will share how I made it in just a moment.  But before I do that, I wanted to share with you the super cute clothes pin!
Okay, so how did I make this little guy you are wondering?!
  1. The board is actually the bottom of an Ikea shelf that I purchased, put together and realized it was the wrong size for the furniture it was supposed to go in. I was unable to return it, so $40 down the drain - I saved it, and used it here.
  2. Sprayed the heck fire out of the piece of particle board using Chalkboard Spray paint
  3. While the spray paint was drying, I cut out the title "Menu" and each letter for each day of the week on my Cricut using Vinyl.
    • Menu was cut using Gypsy Wanderings Font
    • The little swirls were Cindy Loo which I welded to the Gypsy Font using my Gypsy
    • The letters for each day of the week were cut using Cindy Loo
  1. The clothes pin is from Michaels - I covered it in paper, inked the edges and then covered it in Glossy Accents.
  2. I ran the back of the board with Magnet strips using E6000 - nothing else worked, including the glue gun.
If you count the time it took for the board to be ready (24 hours of spray paint dry time and glossy accents hardening time) this was a 2 day project.  If you count just the time I spent working on it, this was a 1 hour project.  And it's SUPER CUTE!  And lets face it, whenever your husband calls it cool project and admires your creativity, you know it's an awesome project.   Not to mention, this was my very first time using Vinyl in my cricut, I'm pretty sure I am in love!

Thanks for stopping by, having a creatively inspired day!


Saturday, October 27, 2012

Halloween Countdown!

Hello Everyone!  I thought I would drop in and share with you a little project that I have been working on for a little while and finished and then immediately put to use.  It is a Halloween Countdown decor project.  In my home, Halloween in celebrated all month long, so I decided it was time we had one that officially counted down to the very special day.  So here is what it looks like:

 I found the frame at my local dollar store and came home and spray painted it with black glitter spray paint.  By the way, that glitter spray paint stuff is TERRIBLE - it was a pain to use and I will be avoiding it in the future...... And here are some close ups:


I originally wanted to you the hitch fasteners to hang my little tombstone tags on, but I did not have any so I used some binder clips instead!  The little skeletons and heads I got from Michael's in their Halloween section.  The beware sign was cut using the Tim Holtz Hanging Sign Die and then I embossed it in distress powder and then put distress ink over it.  The letters and number were cut using my Haunted House Cricut Cartridge.  And then I decorated it a bit more using some of the spider webbing and spiders that are also found widely at Halloween Time.

Supplies:  Haunted Halloween Cricut Cartridge, Bleeding Cowboy TTF (Fonts/Lettering); Tim Holtz Hanging Sign Die, Spellbinders Tombstone (Die Cuts); Graphic45 (Pattern Paper); Bazzill (Glazed Cardstock);

Saturday, September 1, 2012

A Mixed Media Canvas - a first!

I am sure that many of you are already well versed in the mixed media/art journaling world.  This is a new adventure for me to be totally honest - and all began as a way to use up my scraps.  A few days ago while poking around on YouTube and watching some of the Christy Tomlinson videos, I got an idea.  Christy was using all that beautiful paper as a base for her art work, and I thought, "well I have TONS or beautiful pieces of paper left over from other stuff!"  So I broke out my box of scraps pulled out EVERY SINGLE bit of pattern paper in my boxes and then went to work.  I have created 3 canvases and an art journal page (the other two canvases I will show a bit later).  This was the last of the creations and serves a very special purpose.
 
It is a mixed media canvas AND a key holder.  I lose my keys, my husband loses his keys.  This is an awesome way to have a beautiful and crafty place to store our keys! And for your viewing pleasure, just a few closeups of this bit of tasty goodness.

The base, before paint, was made using stamped tissue paper for the sky and green pieces of pattern paper.  I then painted the scene with some watered down acrylic paint - so that the detail could still show through.  I then added texture by stamping in acrylic paint with some of my stamps from various companies.  The scene was then pieced and layed out.  I used my NeoColor watercolor pastels in order to create the shading, along with a Fabercastell Pitt Pen.    The doodling was also done with a Fabercastell Pitt Pen and the white doodles with an American Crafts Galaxy white marker.  I finished by stamping some more texture with my stamps and black Archival Ink.

Thanks for stopping by and have a crafty filled day of inspiration!

Supplies:  Scrapbox Paper Scraps; Fabercastell Pitt Pen, American Crafts Galaxy Pen (Doodles); NeoColor Watercolor Pastels (Highlighting); Unity Stamp Co Kit of the Month (cloud stamp, ruffle stamp, harlequin border stamp, dot background stamp); Stampin' Up! (canvas texture stamp); Acrylic Paint; Golden Gel Medium; Fiskars Border Punch


Wednesday, May 2, 2012

Another Home Decor Min Album Scrapbook Frame

I love mini albums, but to be honest, I've been making TONS of them lately.  And although I love them dearly, they get very tedious SOMETIMES.  And unforuneately, or fortunately, I was feeling the monotony of mini albums during recent assignment at Scrapjazz for an album with the theme of "friends." My thoughts revolved around how to take the concept of an "album" outside the box of an album, and well I came up with, why not lay the album out for display?  This translated into this:

I took a backless frame and a piece of thin canvas board from the craft store to create it.  The canvas was covered with a shimmery cream fabric which I then overlaid with lace.  This was then placed in the back of the frame.  I took 4x4 pieces of chipboard that I had left over from a previous project (yay leftovers!) and covered them with various scraps from my scrap box.  I then found small photos of my me and my friends, and created mini album layouts, using random bits and pieces of left overs - some of the embellishments came from a junk tub that I keep on my desk.  And because I am going through a "everything with banners is better phase" I decided that this piece had to have a title Banner Style.  This is the finished product:

And a close up of the fun banner pieces that were also made with left overs and random alphabet pieces from American Crafts and Pink Paislee:

 The pennant shape was cut from the Pennants SVG file from Lettering Delights and can be found here.  The Octagon shape was cut using Spellbinders Dies, and the rope is from Stampin' Up!  All the paper that I used in this project are left overs from my scraps.  Pretty awesome huh?

Monday, April 30, 2012

Jewelry Frame Home Decor Project

Just a quick drop in to show you a project I have been working on for Scrapjazz.  This project was made with the theme of French Inspiration.  When I saw the theme assignment, I instantly thought of the Boudoir craze and then to the jewelry Hanging frame I had been meaning to make for ages.  With that in mind, I set to work and came up with this:

I used a shadow frame that opens for this project and couldn't be happier.  Although I love all the beautiful jewelry frames out there, I couldn't get over the fact that I would have to get two frames in order to have one for my earrings and one for my necklaces, and I couldn't find a satisfiable solution to my earrings that are not dangely - you know the ones you need to have posts for.  With this, I can hang all my earrings and still easily access the ones with posts without a huge hassle, just opening the door!  I did some damage to the front of the frame while attempting to nail the mesh to the front...... After trial and error and much consultation with Google, I decided that my Staple Gun would be a better option.  But I was still left with a destroyed frame finish.  I easily covered that up with some beautiful trims in my stash, and then added the beautiful Couch and background Eiffel tower from the Summer in Paris Cricut Cartridge.  The flower is from Pink Paislee.  I seriously love this thing!  It's not on my wall yet as I will be moving at some point and don't want to add another hole only to immediately be covering it up.


Saturday, March 17, 2012

Saint Patrick's Day Home Decor Banner

I'm terrible of planning ahead.  If you are a follower of my blog, you will notice this terrible character flaw on occasion by the long lapses in postings......  In my efforts to be better at planning, I started planning my Saint Patrick's Day Banner long in advance.  I figured since I missed the boat on the Valentine's Day Banner, I could get an early start on the Saint Patty's Day one.  Even with that intention, I didn't finish this banner until late late last night.  Saint Patrick's Day is big in my house, my husband being a 1/4 Irish (and a very proud 1/4 I might add) insists on it's observance. Which means Corned Beef (which I loathe with a passion) at the least.  Last year, I made some place mats that we use for the month of March.  This year, I thought I would add to my decor by creating a fun little banner.  My original idea had the phrase " Get Lucky" which I immediately dismissed because of its so many varied meanings...... This was immediately replaced with "Got Lucky?" which was no better might I add......I finally decided on the phrase "Got Luck?"  It is more than the Lucky or Luck banners but not so suggestive as the others, or super long.......  It was just right.  And here is the finished product:

So because I am on a "No Buy" challenge I couldn't go and get patterned paper. This left me with a conundrum and a very happy solution. Although I could have justified my purchase. After all it is project specific and I don't own anything Saint Patrick's Day related...... Still I wanted to make do with what I have. So I made my own patterned paper.  No big deal. I used 6 pieces of 8.5x11 white cardstock that I stamped with various Saint Patrick Day Themed Stamps in various colors.  After I got done stamping them, I cut out one pennant shape using my Cricut and SCAL.  I then used this to cut out the rest of my banners.  To get the most out of my paper, each banner measures 5.5x8.5 so that I could get two for each piece of 8.5x11 piece of cardstock.  Additionally, because these are being used as a seasonal home decor, I wanted them large because they will span a wall.
 
I then trimmed my 8.5x11 Pieces of chipboard in half, and traced the pennants onto them.  I then returned to my trimmer and cut out the triangular piece at the bottom.


After I trimmed them, I lined all of the banners in some Shamrock wire trim - you know the stuff you wrap around things and then throw away afterwards.  I had to use my hot glue gun for that part in order for everything to stick down.  And then I cut everything from my cricut using the Paper Doll Dress Up Cartridge.  I backed the hats, and letters with chipboard.  The gold coins you see  in the pots I cut using a 1 inch circle punch on yellow glitter paper.  Seriously I LOVE how it turned out!  This is the finished product:


 And some close ups of the details:

 And a bit of a confession:
So while I was assembling the banner, I got stuck on what to do, hubby suggested that I put the pots of gold behind each letter - which at that time I thought was silly.  and I ultimately decided to use a Nesties Label shape for my backing - which looked AWFUL, just dreadful.  After gluing it all down, I then cut out the pots of gold...... and immediately decided that the letters would look better with pots of gold. Hubby was right.  Ensued was much lifting, and by lifting I mean ripping and tearing, of glued down letters and nesties labels........  So the point of my story is that even old pros like me make awful, dreadful, painful goofs while crafting.

Supplies:  Studio G Stamps; Provo Craft Paper Doll Dress Up Cardtridge; Stampin ' Up! Classic Inks; Bazzill Cardstock; DCWV Glitter Cardstock Stack; 


Monday, February 13, 2012

Stylish Pin Storage

Today, I am going to start off talking about Mini Album Swaps (of course, what else would I talk about?)  One of the swaps that I have been participating in fairly regularly is the Stick Pin Swaps.  A stick pin swap is basically getting some pretty floral pins, adding beautiful beads to them and then swapping them.  It is a lot of fun, and gorgeous pins are everywhere in scrapbooking right now.  And to be honest, you can make tons of different stick pins with very minimal supplies - so it's a fun, cheap embellishment as well.  With that said, although I have only done a few of the stick pin swaps (2 at this point) I have TONS of pins already.  And the pins are just beautiful, so I wanted them to be visible.  Thus arouse a need for a stick pin pin cushion. But it could not be any pin cushion, it had to be a beautiful one, that fit my style and decor.  I wasn't quite sure how to make them, so I did some research, and came across this YouTube video.  Watch it, it's totally worth it.

And this is what I came up with:


 And a close up of all the beautiful embellishments


Rather than using fiber fill, I used some decorative sand that consistency of emery sand from michaels.  They sell it in the floral department.  It is heavy and thick so it holds my pins nicely.  I got everything I used on coupon, and still have enough sand fill to make another pin cushion!

I have to be honest, this little guy took me a while.  After placing the silhouette piece on I wasn't quite sure what else to do, but it definitely looked very unfinished and ugly.  But it sat on my shelf waiting for the right inspiration.  Well a few days ago while digging through some of my stuff, I found that little Carpe Diem tag and thought it would go perfectly.  I had had the beautiful feather pin already in mind, but it didn't go well with what I had so it too sat.  However, once I put the tag on, everything fell in to place and I had a finished pin cushion.  I am so happy with the way it turned out.

Supplies: Mini Brown Bucket (Michaels); Brown fabric (Joann's); Green and Brown Trims (from my mother); Flower (Prima); Silhouette (from Korean Market); Feather (Feather Accents); Metal Tag (Creative Imaginations); Bling (Michaels)

Friday, February 3, 2012

Swaps, Swaps, and More Swaps

I love swapping, it really is a lot of fun, and a cool way to see new and different ways of doing the same thing.  Just love it.  As you all know, I've been spending a lot of time swapping over at Mini Album Scraps.  The last round, I participated in the Stick Pin, Flower, and "CREATE" word banner swap. And so, today, I thought I would share with you all what I have created! Grab some coffee, tea, hot chocolate, whatever your poison of choice and continue on..... It's a long post with lots of pictures today!

1.  Stink Pin Swap
I love stick pins, really.  And this particular go around, I was excited that it had the theme of Love/Valentines Day. I haven't always been so excited about Love/Valentines Day month, but to be honest, it is a holiday that tastefully surrenders eloquently to crafting girly style.  With that in mind, I went with the colors of love, well mainly Red, Brown and Cream, with some black thrown in.  Here is the finished product:
 A little bit of a confession:  I've been collecting Valentine's Day themed stamps and such for age with all these glorious plans for them that are never really executed. Either way, this is the first time that I have ever used the stamps for the tag!  Even better is the fact that the base that the stick pins are adhered to is corregated cardboard I pulled from the trash. Yes.  The Trash.  I just took of the surface from one side and added some Glimmer Glam and acrylic paint.  It gave it a shabby chic grungy look.  I love it.

And the close up of the stick pins:

 Check out those pins!  I love them!  For this particular round, I got some really pretty specialty beads.  My favorite were the heart charms.  I just loved them!

Supplies: Tag (Cardboard from trash); Cardstock (Bazzill Raven, Bazzill Pomegrante, Recollections Kraft); Stamps (My Sentiments Exactly, Studio G); Inks (Stmapin' Up! Cherry Cobbler, Chocolate Chip and basic Black; Tattered Angels Glimmer Glam; Pearlesent Pearl Paint); Stick Pins (Corsage Pins from Michaels)

2.  Flower Swap
Ever since I got the Tim Holtz Tattered Floral die, I have been on a "create my own flowers" kick.  And let me tell you, it is soooo much fun!  I know that I've said it before, and I'll say it again, if you do not get any other die you NEED this one.  I made all of these flowers from the same die:

 And some close ups of each flower:
These are a paper flowers.  I made these modifying a tutorial a bit to fit my needs.  The flower tutorial can be found here.  Before assembling my flowers, I inked all their edges, after they were assembled I took a toothbrush dipped in acrylic paint and added some color.  I think they turned out fabulous.
 These are a paper and aluminum foil.  This is just the standard rose that there are a bazzillon tutorials on, each is the same.  Just google it and find one that you get.
 And these (by far my favorite) are made with coffee filters.  You can find the tutorial here.
And the tag:

I kept the tag pretty simple so that it can be reused in another project.  The front has been covered in pattern paper, and the back is just plan for journaling and a cute little key stamp.  I sprayed it with some neutral colored Glimmer Mist and inked the edges.  The tag itself was cut from the Tags, Bags, Boxes and More Cricut Cartridge.

Supplies: Ink (Stampin' Up! Chocolate Chip, Stampin' Up! Early Espresso, Stampin' Up! Basic Black); Paint(Americana True Red); Tattered Angels Glimmer Mist Walnut Gold, Red Nose Reindeer; Paper (Michaels Recollections Kraft); Patterned Paper (Recollections Stitch in Time); Cricut Tags Bags Boxes and More Cartridge; Stamps (Studio G)


3.  "CREATE" Banner
I seriously have a deep love for banners.  I never know what I am going to do with them, but I figure I might as well have a stash of them!  However, I am in the process of creating decorated spaces in my home where all the banners I am accumulating will go.  With that in mind, this month's banner swap was specifically for our craft space, and had the color scheme of Pink, Black, and White/Cream. Here is what I came up with:
Aren't they fabulous?!  I had such a fun time making these.  I got some awesome stuff for Christmas, and this was the first thing that I made following Christmas.  So I even got to play with some of my new supplies. And because we are always about the details, some close up pictures:


The hardest part about making these guys was trying to figure out how to use the Martha Stewart combination punches the edger and the corner rounder.   After some trial and error I totally got it, and if you want something else to add to your stash, her punches.  I am in love with them.  They are fabulous to have on hand!  The beauty of this project is that I used 4 sheets of 12x12 plus scraps from my scrapbox to make these all.  So not very supply heavy at all!  One of the benefits to making banners - you can use up all your random bits and pieces.

Supplies:   Bazzill Glazed, Bazzill White, DCWV Glitter Pack, GCD Patterned Paper, Recollections Pink Card Stock (Paper and Cardstock); Stampin' Up! Classic Ink (Ink); Gypsy Wanderings (Font); Cricut, Martha Stewart, Stampin' Up! (Punches and Tools); Prima (flower); Michaels Dollar Spot (Bling); Stick Pins were handmade.
Hopefully you have enjoyed my shares, and feel inspired to do some creative crafting yourself!

Monday, January 30, 2012

Home Decor: Tile Coasters

Hello all my lovelies,

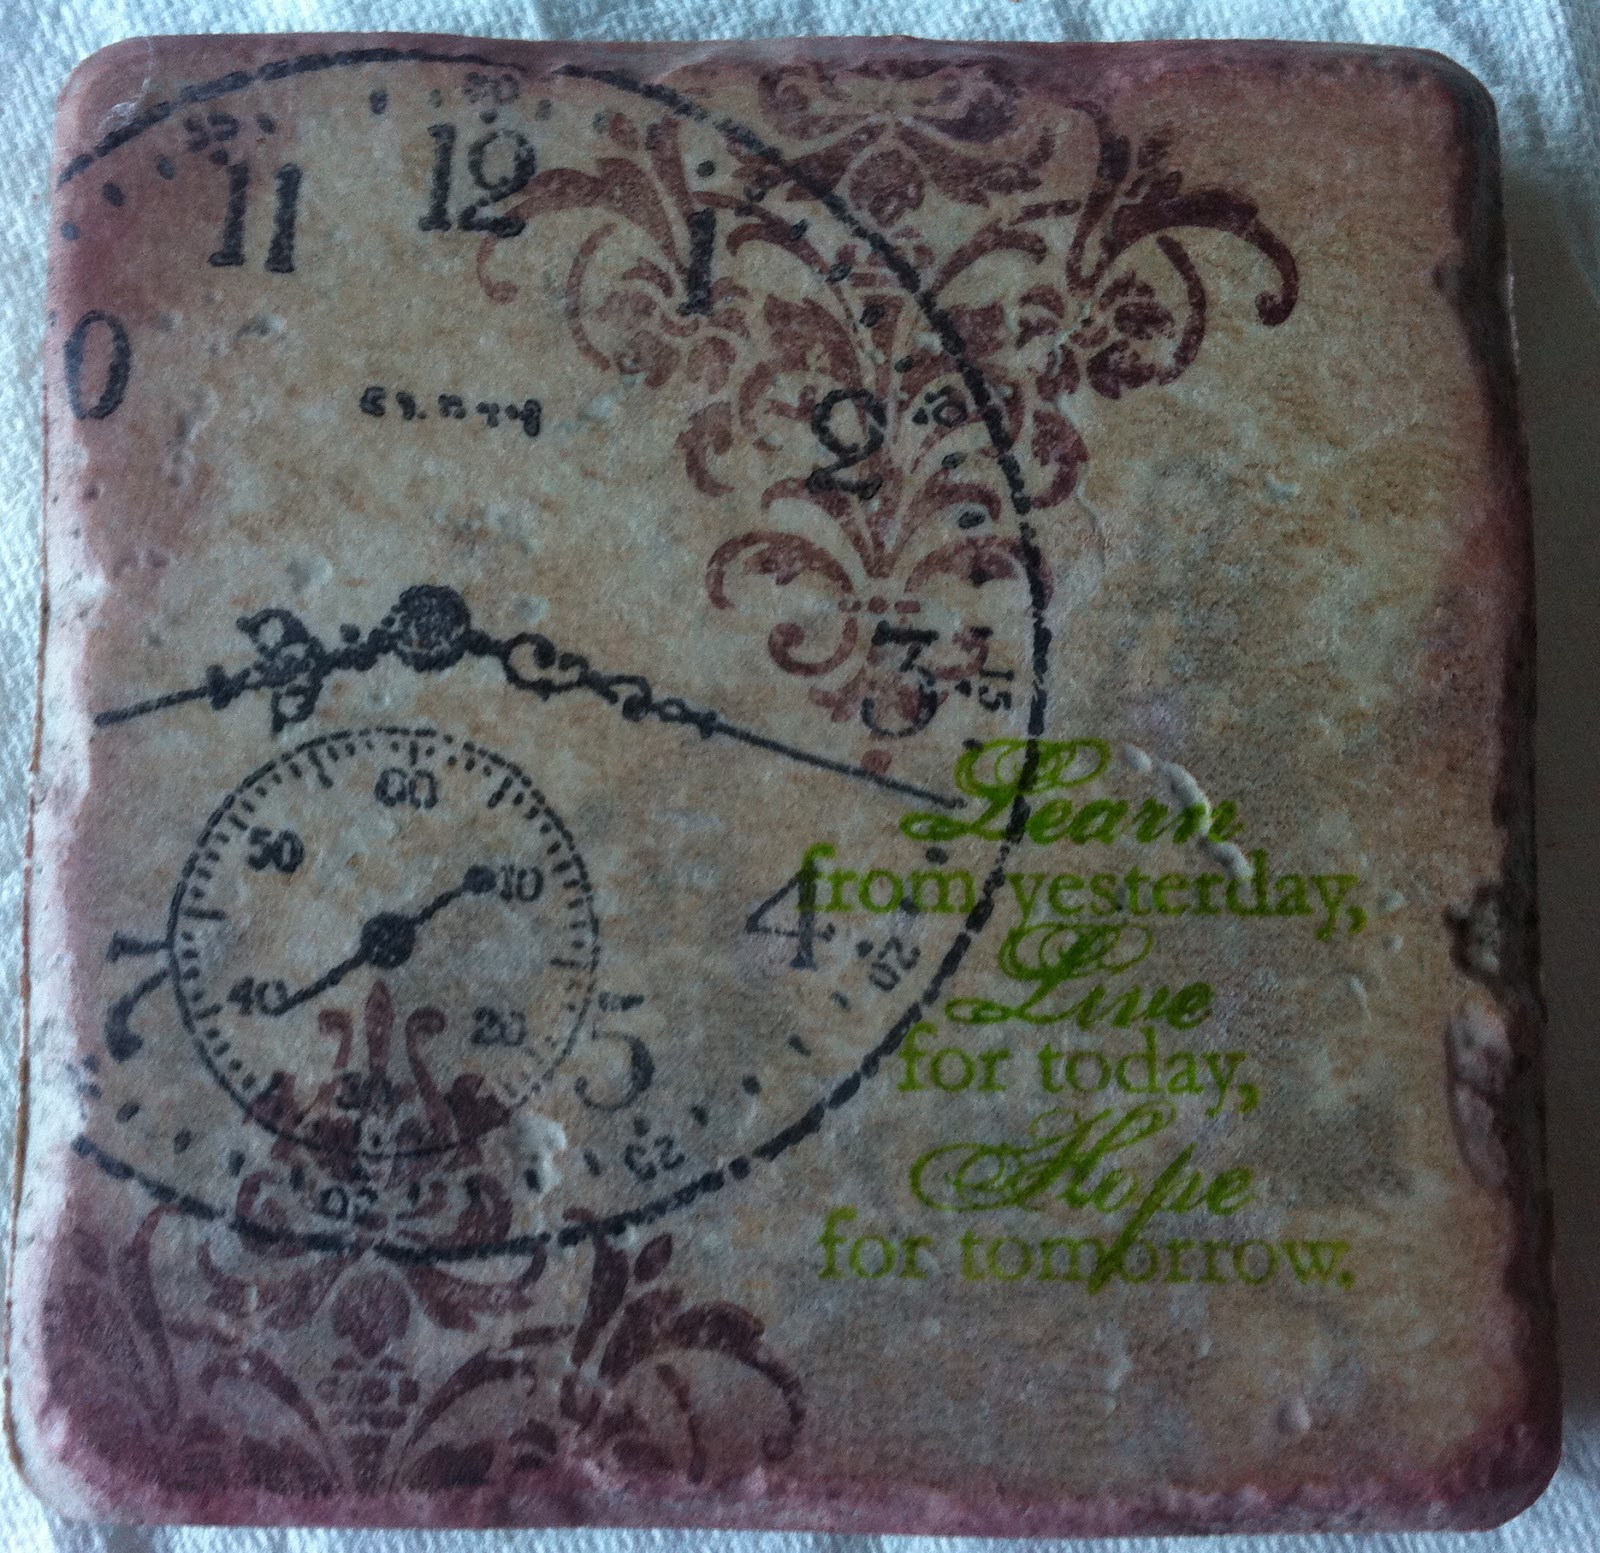
I'm back with another home decor inspirational share. I really like getting the most out of my craft supplies.  And to be completely honest, so does my hubby.  He finds a lot of enjoyment out of my home decor items that I created using my supplies.  Even it I got the idea from somewhere else, it doesn't matter, it's just super cool I can make nice stuff for our little home.  With that in mind, I thought I would share some coasters I made a little while ago with you today.

I love them.  Just love them.  I made a matching set of 4 with marble tiles that I got from the hardware store.  The hardware store sells them in boxes or separately for very cheap.  So when I went I got a whole box!  You can get ceramic or marble, and I have made coasters using both ceramic and marble - I like the ceramic ones better, the rough surface is easier to work with and in my opinion looks better.  But never the less, I love how these turned out.  These were also made with the intention of trying out a new stamp set I had gotten from Stampin' Up!  I love the stamp set, I love the coasters, I'm just in love with them.  Every time I look at them on my table, I am happy.  I got the idea from this Tile Coaster Tutorial over at SplitCoastStampers.  Oh, and the beauty?  All 4 took me about 15 minutes to do!  I LOVE IT.  Super fast and easy!  And in case you are wondering, yes they are color fast - I have soaked these puppies and wiped them dry and the ink doesn't go anywhere.

Supplies:  Marble Tiles; Ink (Staz On Timber Brown, Staz On Jet Black, Staz On Cactus Green); Stamps (Stampin' Up! Sense of Time)

Thursday, December 8, 2011

Inspiration Thursday: Holiday Decor

Happy Holidays!

Hubby and I recently put up our tree and hung our stockings.  While he was hanging our stockings, he was musing allowed about how to tell the stockings apart.  I myself had wondered about this very often - recently, I received an answer for that bewildering issue.  Well, while I was at a my friend's (Shannon) home, she was putting together some stocking ID tags.  This is what these tags look like finished:

 Are they not gorgeous?  She cut out some chipboard covered in some pretty holiday patterned paper with her  Sizzix and then used some letters left over some another kit, which she embossed in gold embossing powder.  The holly leaves were cut with her sizzix and the berries were made with buttons.  She attached them with some ribbon.  I LOVE THIS IDEA.  And I will be doing my own here very shortly. 

Thursday, November 17, 2011

Another Home Decor Project: Fridge Magnets with a Tutorial

I have an obsession with fridge magnets.  Hubby and I get them whenever we go on vacation, but I also like to make magnets.  A few months ago, while going through my stash, organizing, condensing, and tossing, I came across my stash of these buckets:

I have a ton of them, and many of them had these cute little magnet tins on the top that held coordinating chipboard buttons or other embellies.  I don't think Prima packages this way anymore, but none the less, I had premade dimensional magnet shells.  So, I went to work and came up with these


In all I made about 6 of these from the tops and bottoms of the prima magnet containers.  They were very very easy to make.  This is what you will need:

Some type of item with some depth - here I used tins, you can use anything that will hold epoxy
2 part epoxy mix
photos and embellishments of choice
Strong magnets (these will be heavy with the epoxy in them)

And this is what you will want to do:

1.  arrange your pictures and elements as you so desire and glue down.  Keep in mind the depth of the item you are using as you will not want them sticking above the epoxy.  Also, the epoxy will saturate things such as flower making them darker or translucent - so keep that in mind.
2.  mix the epoxy according to the insturctions
3.  poor the epoxy over the item until it is flush with the edge of your magnet container
    a.  If you notice, I have glitter in my large on: to do this, fill the tin halfway let it set for just a bit, then add your glitter or beads and finish filling.  It will give you the in suspension look.
4.  set them aside and let them dry - about 48 hours for them to be completely cured.
5.  Adhere your magnet to the back and VOILA!

Hope you enjoy!

Sunday, November 13, 2011

Home Decor and Wall Art


I love making handmade pieces of wall decor.  It's soothing, fun, personal, intimate, and well economical. So, today, I thought I would share some of the different pieces I have made over the past few years and hang on my walls.  I love them.

The first one, is a collage I made after my husband and I got married.  It is a slightly religious piece and focuses on the The Family: A Proclamation to the World, which is a little piece of revelation from the Prophet and his counselors of the Church of Jesus Christ of Latter Day Saints.  For me the family starts with the couple, all the love, respect, devotion, courtesy, admiration in the couple impacts and is reflected in the rest of your family or future family.  This is something that is important to both my husband and I and I wanted to capture it.  And this is what I cam up with:

 This project took a lot of time.  I had to measure, cut, layout and then glue down.  But it is also one of my most rewarding projects that I have. The paper I used in the background is actually large sheets of water color paper I got from michaels.  I used left over embellies from another project, and did a little bit of stamping.

This second one, was made as part of a National Scrapbooking Day challenge at Scrapjazz.  We were given a necklace from Urban Outfitters as inspiration for something.  And this is what I came up with:

I love it.  Always have, and always will.  It's whimsical, elegant, creative, inspiring, and touching all at the same time. The flowers were all made by me using wide pieces of ribbon.  I trimmed photos down to fit inside those Making Memories metal frames, and used some of Tim Holtz's fragments for the patterned paper pieces.

The third piece is a little bit of home I take with me everywhere.  I am a natural girl at heart, I love earth, trees, and no buildings.  It is grounding, inspiring, calming, and freeing.  When I moved to a California for school, I found myself far away from everything I love.  So to keep the homesickness at bay and improve my mood, I made this:


This last one was really more just for fun.  I was inspired by the stamps and wanted to try stamping with acrylic paint.  Again, it is a piece that I am just in love with.  Simple and fun, but a captured moment of bliss between my man and me.

I love this stamp from the Donna Downey Unity Stamp cobrand kits.  Just love it.  That bird, was paper pieced with handmade paper. 

I hope you enjoyed today's share and maybe found some inspiration for your own home decor and wall art!

Thursday, November 10, 2011

Inspiration Thursday: Project Ideas

I like to troll crafty blogs, and get awesome inspiration and project ideas.  If I'm not crafting... then well I'm looking for crafting ideas. It's a glorious and vicious cycle that I gladly partake in.  Which brings me to this quick post, some things I have been inspired by recently:
  1. This awesome frame made with a halloween theme, but could easily be adapted, it has been added to my future crafty projects list.  I already have the frame so a post will be coming shortly with my rendition.
  2. Shadow Boxes, they are everywhere, and here are some cute ideas that have been inspiring me: This cute little guy made by Holly Simoni and this one from other at Pink Paislee which I must say is just fabulous.
  3. Gift Tags - I am seriously thinking of making all my own tags for gifts this year and just wrapping all my gifts in simple brown paper.  Take a look at these by Lindsay, dimensional trees are awesome, and these by Lesly Langdon who is just amazing! 
  4. This bird house is awesome and I have a really great idea to turn this into a meaningful ornament - stay tuned for that in December!
  5. And look at this fabulous Cookie Sheet Calendar.  I have several ideas for this that will be put into action over my winter break starting in a few weeks!
Hopefully you all are as inspired as I am!

Cheers.