Saturday, January 22, 2011

Office Supplies

Yep.  Use them in your layout.  That is Challenge #86 over at Scrapwhispers.  A little secret.... my office is my scraproom.... But I do not think that is what they meant. So I had to really think, I mean REALLY THINK - what does come in an office?  Staplers. Paper. Stamps. Pens. Paper Clips. Memo Boards.  I choose the Memo Board. And came up with this:

Supplies: Cardstock (Bazzill); Cork (Unknown); Ribbon (American Crafts); Ink (Tattered Angels, Sakura); Brads (Joanns, Queen and Co.); Flowers (Prima); Stencils (Tattered Angels); Font (Prissy Frat Boy); Dated Stamp (Unknown)
All the yummy texture up close


Yep.  Thats right, a cork memo board!  And, how about that bill paying stamp?  I've been dying for ages to get one just to be a cool "bill payer" and it looks awesome on Layouts.  I'm not gonna lie, bonus points for multiuse items!

Thanks for looking.  And as always, I love your comments!

Color Combos Galore #176


 This is the reveal for this week over at Color Combos Galore.  It is such a luscious color combination.  It reminds me of summers in the South, sitting on a wrap around porch eating fresh blueberries.  Subtle. Lovely. Vibrant. The prompt was to use clouds on the page.  Clouds conjure up associations of the celestial, heavenly, surreal.  With all of these thoughts came this specific picture in mind.  One of those rare moments where sentiment of the heart  is caught on camera.  I really wanted something that captures all that I feel in the picture.  Lyrical.  Whimsical.  Nostalgia. Depth.
Supplies: Cardstock (Bazzill, Joann's); Patterend Paper (Paper Pizzaz, Unkonwn); Inks (Tattered Angels, Sakura, Tsuineko); Paint (FolkArt); Vellum (Joann's); Letters (American Crafts); Stencil (Tattered Angels); Rhinestones (Zva, Recollections); Ribbon (Michaels, Unknown); Stamp (Tattered Angels); Clouds (ProvoCraft Give a Hoot Cartridge)
So much going on in this layout!  It took a while to put together.  Laying the ribbon down took about 2 hours, mainly because the first two go arounds did not work out very well so I had to pull it up and redo it.  Twice.  I finally ended up ruffling it and then stitching the sides to adhere it to the page.  This allowed me to push the ruffles to either side of the photo without losing anything and having a flat part under the photo so I could put the photo on top of the ribbon without too much bumpy bulk.  I hate bumpy bulk under photos.  Oh!  But before that part, was the painting of the cardstock and patterned paper.  That had to dry overnight.  Dry brush and splatter.  The clouds.... this was my favorite part.  (Back Story)  I recently went to a crop where I was complaining about ALL OF THE VELLUM I bought back when it was cool. Yah, I made THAT mistake.  Well I still have it and had no idea what to do with it.  My lovely croping buddy Shannon suggested that I emboss the vellum.  Shannon is a very talented scrapbooker and cardmaker.  Today I am thankful for her suggestion.  The clouds were cut with my Cricut and the Give a Hoot Cartridge.  I then inked the edges and ran them through my cuttlebug with an embossing folder.  The white cardstock ones, done the same way only with a Spellbinders impressabilities.  I. am. in. love.

Friday, January 21, 2011

Something New For Me

I consider myself a papercraft but really that means that I do Scrapbooking and have recently ventured into Cardmaking - and of course the occasional altered item.  However, making USEFUL items out of my overflowing stash is a foreign concept to me.  So..... When I saw the most recent Scrapwhispers blog hop tutorial, I had to give it a shot.  It is a for a Gift Bag, and I figured with Valentine's Day around the corner I could make my hubby's gift wrapping early (I can post this because I know he doesn't read my blog, at least yet).  Thus, my wonderful creation and first attempt at a gift bag entirely made by yours truly!

Supplies: Patterned Paper (Carolee's Creations); Mulberry (Joann's); Cardstock (Joann's); Vellum Tag (Joann's); Chain (Beadalon); Ribbon (Spool O' Ribbon); Eyelets (Unknown); Die (Spellbinders); Stamps (Unity, Unknown); Ink (Ranger, Tattered Angels, Tusineko); Mask (Tattered Angels)


The best part about this project for me was the fact that I got to use up some paper that I was about to donate to the used paper gods primarily because it was so darn ugly.  However, folded up into a nice little gift bag and the paper took on a whole new life of it's own.  I wanted this gift bag to look "store bought" but with the handmade touches my dearly loved loves so much.  Hence the gift tag, that is attached to the bag with a chain through one of the holes. 

Thursday, January 20, 2011

My Coloring/Spray Adhesive Station

Okay... so we all know that this is an issue.  Glimmer Mist.  Acrylic Paint.  Spray Adhesives. Basically anything dealing with the liquids of papercrafting.  I am talking mess containment here - nothing more maddening than accidentally getting over spray on those photos you (meaning I) just printed, that layout that is almost done, or that piece of whatever that you (meaning I) did not realize was there.  I've tried those flat mess mats - but honestly it's a pain and doesn't really control overspray and such.  It just protects the surface under the mat.  Are crafters able to keep the mess contained to that small area anyway? And I don't have a dedicated wet station area to keep the mat at - not that I would need it if I did.  Thus I have rendered those mats USELESS and cost inefficient.  Enter MY SOLUTION.

Some places (and companies) have started to sell a partial cardboard box to catch the oversrpay and stuff.  What I like is it's portable - you can stash it when not in use, take it out when needed, place on top of whatever, and mess. is. still.contained!  Well my version, was FREE.  That's right FREE, and from a department store no doubt.  Yes, that little mess container is a large garment gift box.  And THAT is my little wet station.  Nice thing is that with each box, you get two mess stations.  so if for whatever reason you misplace your first station, you always have a second.  =D

Pagemaps Sketch

I really like sketches, generally when I am having a hard time getting started.  It's a good way to jump start your creativity.  Well Becky Fleck has a wonderful challenge blog to go along with her PageMaps site.  On her blog, she posts contests and challenges that are tied to one of her sketches.  The current challenge sketch is posted to the left.  While my interpretation is below.


Supplies: Cardstock (Bazzill, Joanns); Patterned Paper (Three Bugs In a Rug); Lace Paper (KI Memories); Journal Block (Colorboc); Flowers (Prima); Brad (Pink Paislee); Designer Tape (Pink Paislee); Silver Frame (Joanns); Ink (Sakura, Tusineko); Date Stamp (Office Supply Store); Paper Punch (EK Success); Title (Opposites Attract)
Random pictures of me and the man, being big goofs.  That hat I found at the mall and JUST HAD TO HAVE it, hubby thought it was adorable and said I could get it.  You better believe that I wear that hat out in public.  But before I did that, the camera came out and we had some fun being goofs.  I <3 my man.

Wednesday, January 19, 2011

CPS #201 and Scrap Whispers Challenge #85

Another quick post, about some cards that I whipped up while watching TV with the man.  I used the sketch from the Card Positioning System Blog.  They have some great sketches for cards and is definitely visit as a go to when I am stuck on layouts for cards.   The cards were completed as part of challenge #85 on Scrap Whispers.  The challenge is to create a Valentine's Day themed card using black, red, and glitter.  Yep and you guessed it, I did mine with LOTS of rich detail!  Luscious texture. yum. The background was letter pressed using a Spellbinders impressabilities, the heart is embossed.

Supplies: Cardstock (Making Memories, Bazzill, Joann's); Mulberry (Unknown); Embossing Template (Spellbinders); Stamps (Hero Arts, Unity); Ink (Ranger, Tsuineko); Embossing Powder (Stampendous); Punch (EK Sucess)

Color Combos Galore #175

Two posts today!  I know!  I'm catching up on my personal scrapping, I have been so focused on a project I have been working on that I was losing my interest in and desire to scrap.  So much so that even my lovely man has noticed and commented.  As that was the case, I have decided to set that little energy draining project aside for a bit and focus on what I love about scrapbooking, the Crea.Tiv.Ity.  With that, when I want a creative boost, I meander over to Color Combos Galore.  I love this place, everyone is friendly and they have the most awesome color combinations and challenges ever.  This is their current color combo and the challenge was to incorporate "comfort" into the title.   You can see that to the right here.  And my take on the challenge is below.
Supplies: Patterned Paper (Basic Grey, We R Memory Keepers); Cardstock (Joanns); Ink (Tattered Angels, Sakura, Tsuineko); Stickers (EK Success); Photo Turns (Making Memories); Brad (Pink Paislee); Flowers (Prima); Bling (Unknown); Letters (Pressed Petals); Mask (Tattered Angels); Punch (EK Success); Tag (Unknown); Ribbon (Unknown)


These are pictures of one of my favorite places.  It is just absolutely beautiful and is the gold standard of Pacific Northwest beauty and charm. 

It's a Fair Thing

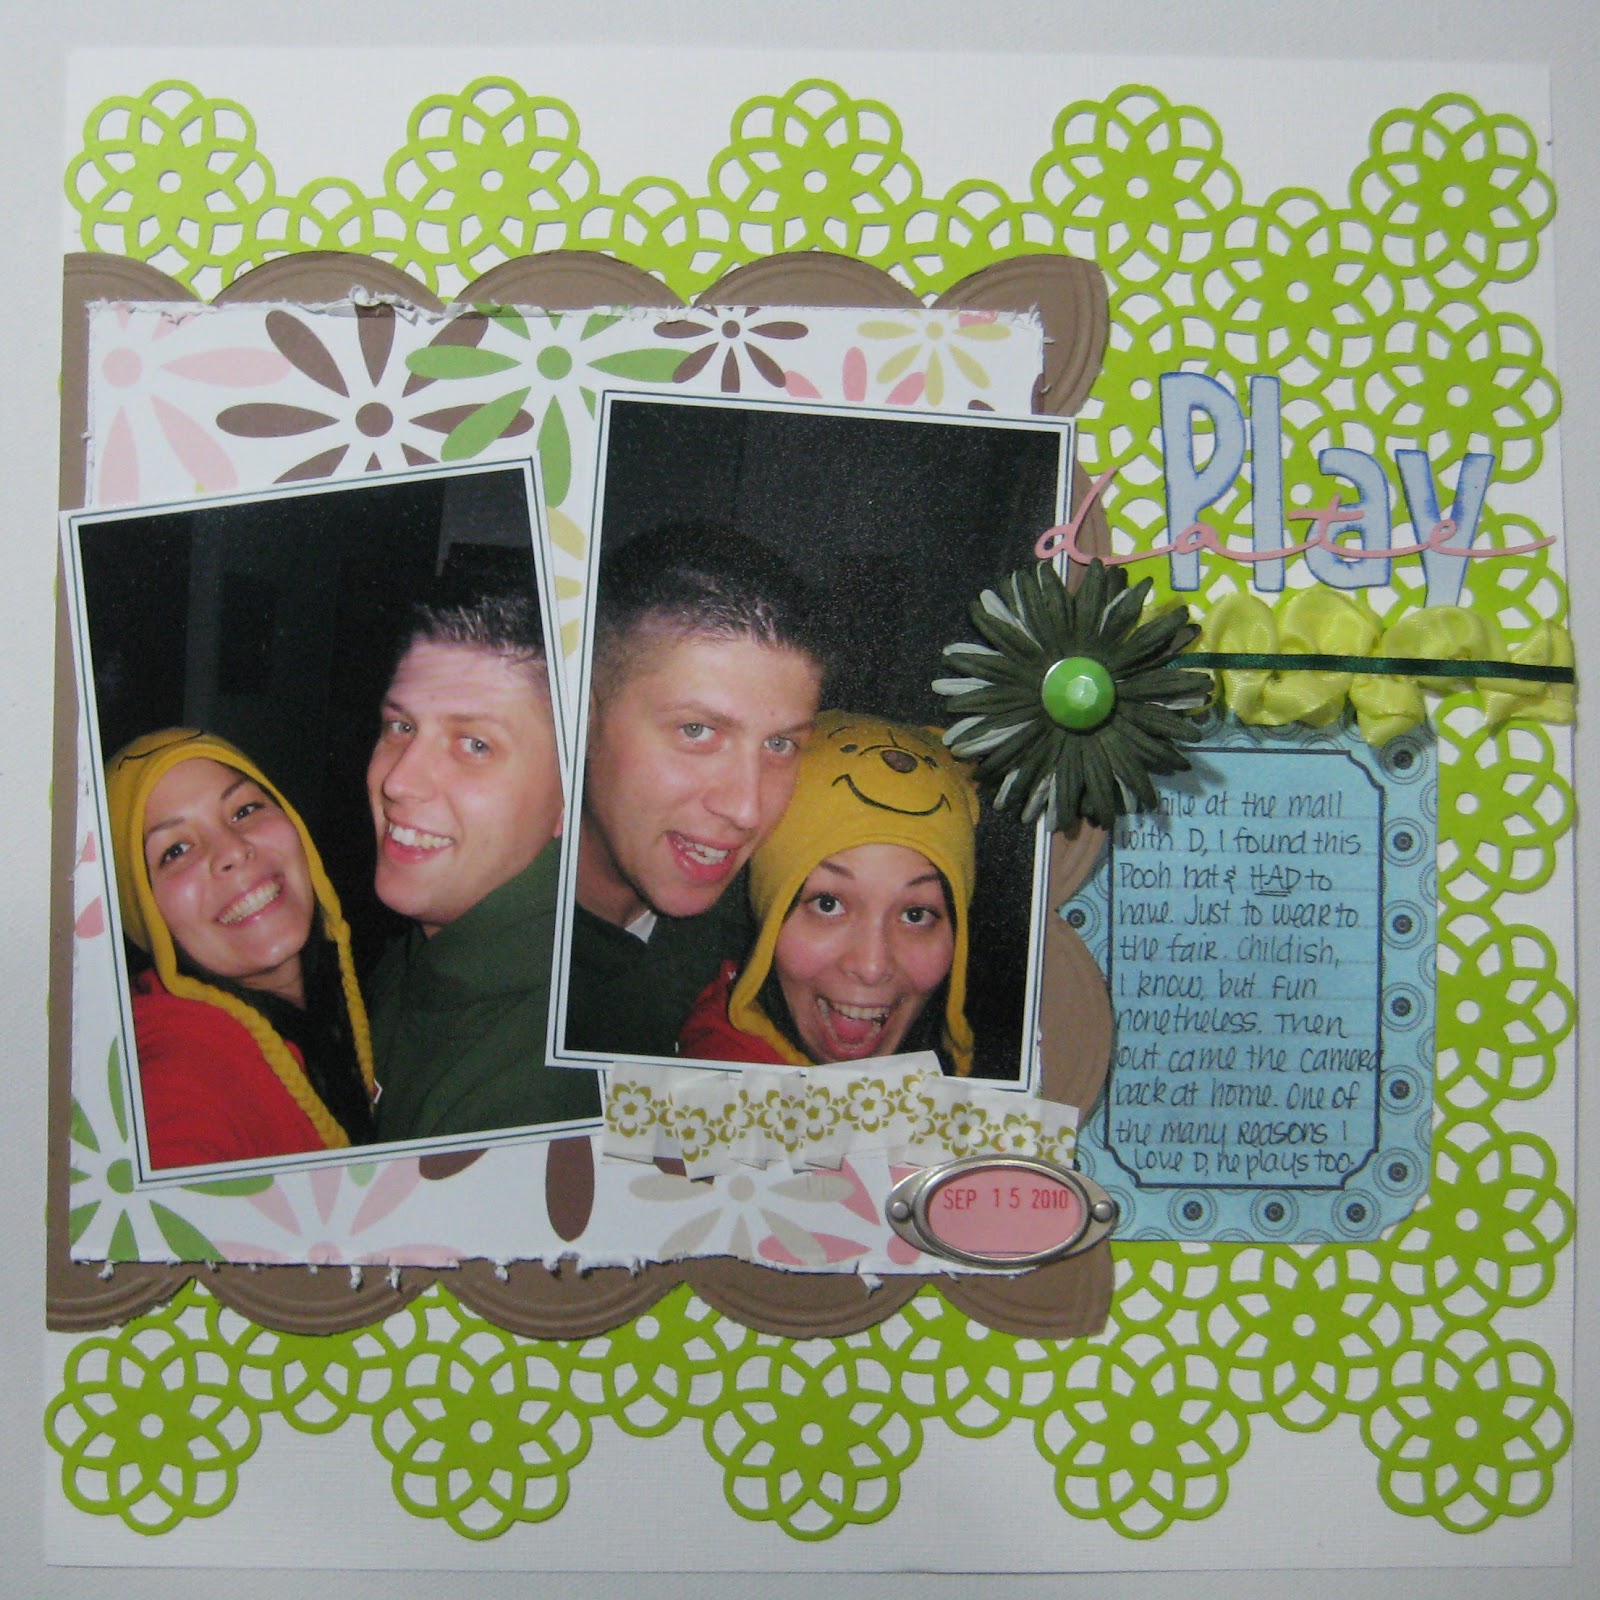
Yep, county/state fairs, I LOVE THEM.  Seriously, everything about them.  The people, rides, fatty foods, live stock, smells, etc.  I. Love. All. Of. It.  This last year was particularly enjoyable, because it was the first Puyallup Fair I had the opportunity to drag my lovely man to.  It was a blast.  That was in September.... here it is January and I am NOW scrapping the pictures.  This was my first attempt at making a banner, let alone a banner title, and it took some time!  Mainly because I decided it would ALSO BE A GOOD IDEA to learn to make fan flowers.  Well 1 hour later...... I had my banner!  I think I found a new love.  Bannered titles. yum.

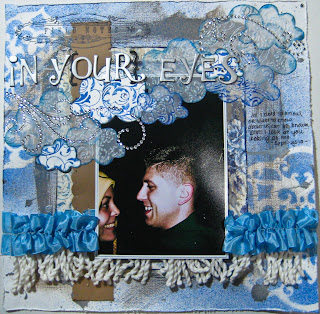
There is a lot of detail on this particular layout.  This is something I have decided to work on for the next year.  Lots of luscious texture and detail.  I am finding a new appreciation for the time it takes.....


Supplies: Paper (My Minds Eye, Pink Paislee, Basic Grey); Cardstock (Bazzill, Joann's); Ink (Tattered Angels, Tsuineko) Brads (Joann's); Fibers (Unknown); Stickers (Making Memories); Rubons (American Crafts); Adhesive (Beacon 450, GlueArts, Judikins Diamond Glaze); Journaling Block (Colorboc); Fonts (Baby Bowser); Special Tools (Cricut)

Monday, January 17, 2011

Altred Scrapbook Cover

Just a quick share, of something I did a few years ago...... before I knew about blogging of course.  Well here it is

An altered album.  It was originally red, I tore the cover off and left the spin intact.  I then took serendipity squares cut in 2x2 inches and adhered them to the front and back of the album using Wacky Tacky Tape. 

Thursday, January 13, 2011

Coolest Adobe Lightroom Tutorial EVER... And the End to My Questing

For my birthday last year my wonderful man bought me Adobe Photoshop Lightroom.  I was so excited because I thought that this would be the source of endless picture package printing options!  Disappointment soon ensued when I discovered that I could only do single multiphoto picture packages (you know one picture per a page in different sizes).  This is AWESOME for a photographer, not so useful for a scrapbooker let me tell you!  Well, I recently stumbled across this website for a cool picture package tutorial.  This handy-dandy tutorial shows you how to create multiphoto picture packages!  I. Am. In. Love.

And this is what I did with it.

Supplies:  Patterned Paper (Wild Asparagus); Fonts (Cry Kitty, Digs My Heart); Cardstock (Bazzill, Recollections, Cardstock Pack, Making Memories); Flower (Prima); Ribbon and chipboard letters (Pinkn Paislee); File Tab (7Gypsies); Vellum (Vellum Pack Joann's); Ink (Memento); Metal Letters (Joanns)